
Terrariums in the classroom aren’t just about growing plants, they’re living science labs that fit on a windowsill. Teachers across the U.S. and U.K. have used them for years to teach water cycles, decomposition, and even climate concepts. Most setups fail within weeks because of simple mistakes.
With the right approach, a single terrarium can last an entire school year, engaging students from kindergarten through high school.
Research from the North American Association for Environmental Education (NAAEE) shows that hands-on ecosystem projects like terrariums boost student retention by up to 40% compared to textbook lessons. As of 2026, many schools are adopting them as part of STEM curricula. Success depends on choosing the right type, plants, and maintenance routine.
Quick Answer
Terrariums in the classroom teach ecology through hands-on observation. Students track water cycles, plant growth, and decomposition in real time. Closed terrariums show self-sustaining systems, while open ones demonstrate evaporation.
They work for all ages, cost under $20 to build, and align with STEM standards. Proper setup and plant choice prevent early failures.
Why Terrariums Belong in Your Classroom (And What Most Teachers Get Wrong)
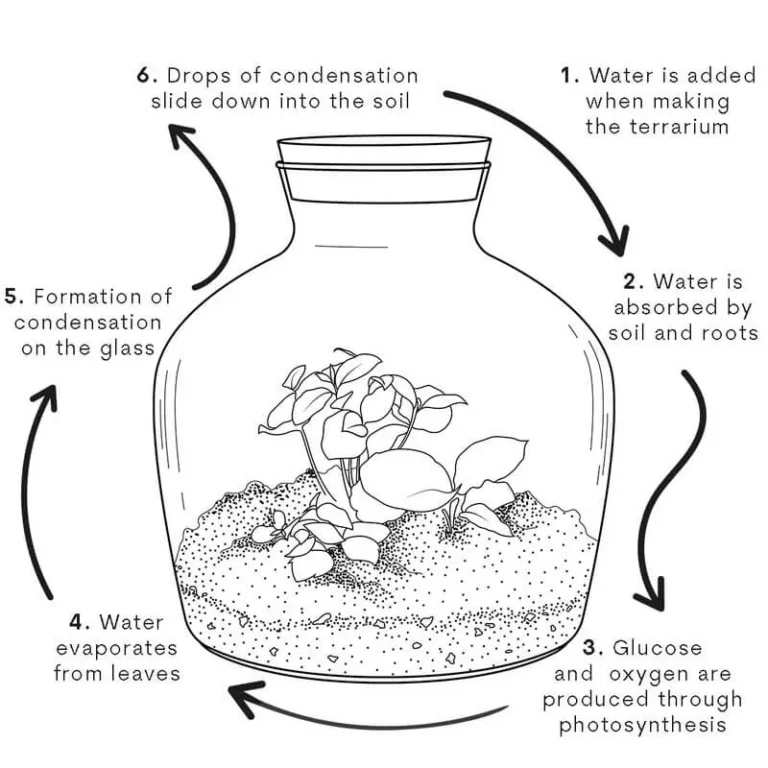
Most teachers assume terrariums are just decorative, until they see students crowding around to check condensation levels or debate why their moss turned brown. These mini ecosystems turn abstract science into something tangible. A sealed jar becomes a model of Earth’s water cycle, where students can see evaporation, condensation, and precipitation in action.
They also introduce decomposition when leaf litter breaks down, releasing nutrients back into the soil.
The biggest mistake? Treating terrariums like regular potted plants. Unlike a classroom cactus, a closed terrarium recycles its own water and oxygen, creating a self-sustaining loop.
That’s why overwatering is the #1 killer, teachers often drown the system before it stabilizes. Another common error: using the wrong plants. Tropical ferns thrive in high humidity, while succulents rot.
We’ll cover which species work best later.
What a Terrarium Actually Teaches Kids (Beyond “Plants Grow”)
A terrarium isn’t just a plant in a jar, it’s a microcosm of Earth’s systems. Here’s what students learn, broken down by grade level:
| Concept | Elementary (K-5) | Middle/High School | Real-World Connection |
|---|---|---|---|
| Water Cycle | “Where does the water go?” (evaporation) | Measuring condensation rates | Climate change, droughts |
| Photosynthesis | “Why do plants need light?” | Tracking oxygen/CO2 levels with sensors | Carbon footprints, deforestation |
| Decomposition | “What happens to dead leaves?” | Identifying decomposers (springtails, fungi) | Composting, nutrient cycles |
| Symbiosis | “How do plants and bugs help each other?” | Mapping food webs in the terrarium | Ecosystem balance, biodiversity |
| Adaptations | “Why does this plant have fuzzy leaves?” | Comparing humidity tolerance | Survival in extreme environments |
For younger students, terrariums make invisible processes visible. A kindergartener might not grasp “evaporation,” but they’ll remember the day they saw water droplets form on the glass after a sunny morning. Older students can take it further: measuring pH changes in the soil, tracking plant growth with rulers, or even adding isopods to observe decomposition firsthand.
One caveat: Terrariums aren’t truly self-sustaining. They’re low-maintenance, not no-maintenance. Without occasional pruning or water adjustments, they’ll collapse, but that’s part of the lesson.
When a terrarium fails, it becomes a case study in ecosystem fragility.
Closed vs. Open Terrariums: Which One Fits Your Lesson Plan?

The choice between closed and open terrariums depends on your goals, classroom conditions, and how much maintenance you’re willing to handle. Here’s how they compare:
| Factor | Closed Terrariums | Open Terrariums |
|---|---|---|
| Humidity | 70–90% (self-regulating) | 30–50% (dries out faster) |
| Water Needs | Rarely (every 4–6 months) | Weekly misting |
| Best Plants | Ferns, mosses, fittonia, peperomia | Succulents, air plants, cacti |
| Lesson Focus | Water cycle, self-sustaining systems | Evaporation, drought tolerance |
| Maintenance | Low (but prone to mold if overwatered) | Moderate (needs consistent light/water) |
| Classroom Fit | Ideal for long-term projects | Better for short units or dry climates |
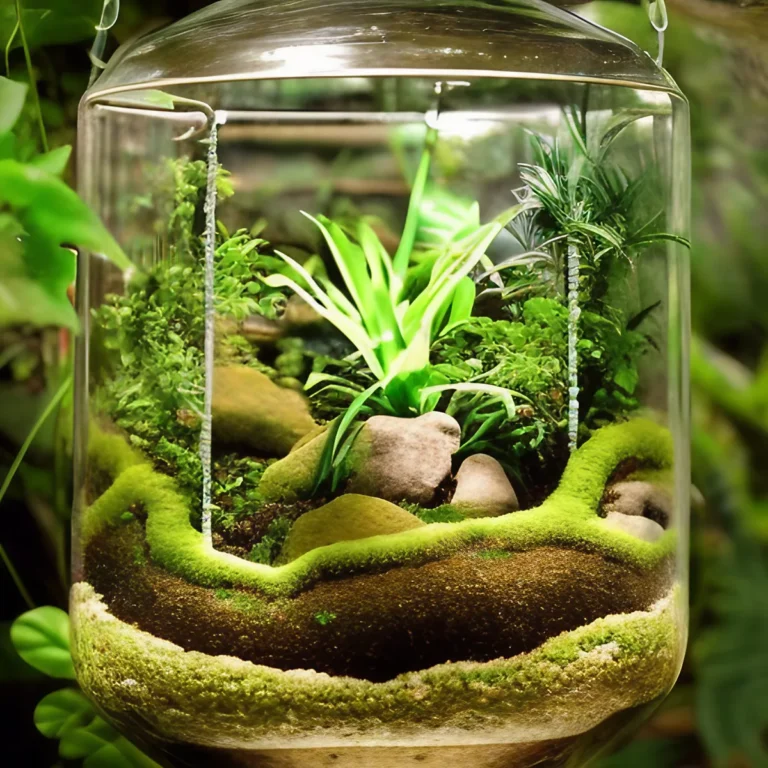
Closed terrariums are the classic “ecosystem in a jar.” They recycle water through condensation, making them perfect for teaching the water cycle. The downside? They’re sensitive to temperature swings, direct sunlight can turn them into saunas, cooking the plants inside.
If your classroom lacks consistent light, supplement with artificial lighting.
Open terrariums are simpler but require more attention. They’re great for demonstrating evaporation or drought adaptations, but they dry out quickly. If you’re in a humid region, open terrariums might grow mold faster than closed ones.
For classrooms with limited time, they’re easier to reset if something goes wrong.
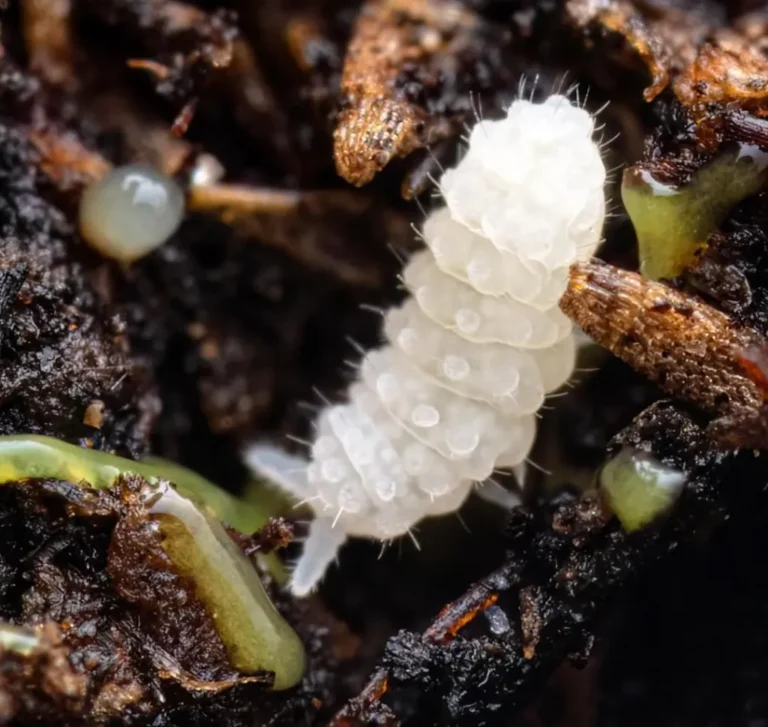
Pro tip: If you’re teaching decomposition, closed terrariums are the way to go. The high humidity speeds up leaf breakdown, and students can observe fungi and springtails at work. Open terrariums, on the other hand, are better for studying how plants adapt to dry conditions, like succulents storing water in their leaves.
The 5-Minute Classroom Terrarium Checklist (Supplies You Actually Need)
You don’t need a fancy kit to build a classroom terrarium. Here’s what you do need:
You don’t need a fancy kit to build a classroom terrarium. Here’s what you do need:
Essential Supplies
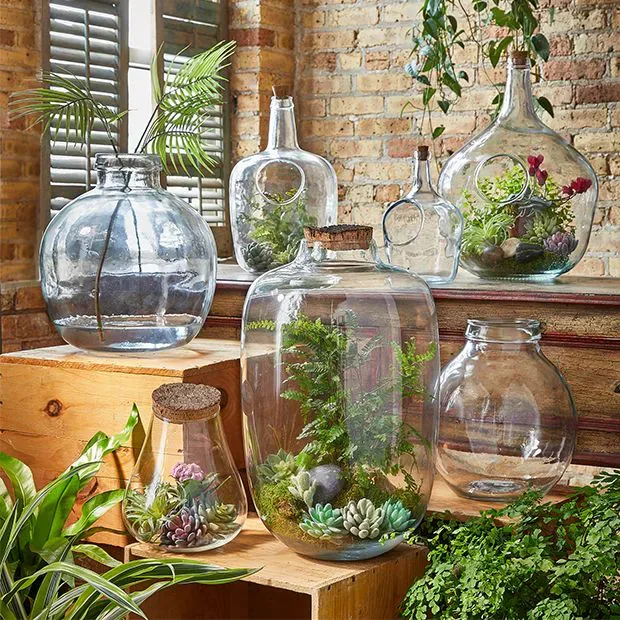
- Container: Glass jar (mason jars, fishbowls) or plastic container with a lid. Avoid metal, it rusts. For younger students, use acrylic containers to prevent breakage.
- Barrier layer: Gravel, pebbles, or activated charcoal (1, 2 inches). This prevents root rot by draining excess water. Skip the charcoal if you’re using a very small jar.
- Substrate: Potting soil (sterile, no fertilizer) or a terrarium-specific mix. For closed terrariums, add a thin layer of sphagnum moss to retain moisture.
- Plants: 2, 3 small plants. Avoid fast-growing or invasive species.
- Tools: Spoon (for soil), spray bottle (for water), tweezers (for planting), and a ruler (for measuring growth).
Plant List (By Terrarium Type)
| Closed Terrariums | Open Terrariums |
|---|---|
| Fittonia (nerve plant) | Echeveria (succulent) |
| Peperomia | Haworthia |
| Moss (sheet moss, mood moss) | Air plants (tillandsia) |
| Mini ferns (button fern) | Jade plant (small varieties) |
| Avoid: Cacti, herbs, or anything with deep roots. | Avoid: Tropical plants like ferns or fittonia. |
Where to Get Supplies (Cheap or Free)
- Dollar stores: Jars, spray bottles, gravel.
- Garden centers: Ask for plant cuttings or “offcuts.”
- Nature: Collect moss, small rocks, or leaf litter (sterilize in the oven at 200°F for 20 minutes).
- Recycling bins: Plastic containers, glass jars (clean thoroughly).
Cost breakdown:
- DIY (recycled materials): $5, $10
- Pre-made kit: $20, $40 (includes plants and tools)
- Classroom set (10 terrariums): $50, $100 (bulk discounts on soil and plants)
Step-by-Step: Building a Terrarium with 30 Kids in One Hour
Here’s how to turn terrarium-building into a smooth, engaging lesson, even with a full class.
Before the Lesson
- Prep containers: Wash jars with soap and hot water. If using glass, tape the edges to prevent cuts.
- Pre-measure layers: Fill small cups with gravel, charcoal, and soil so students can scoop directly.
- Pre-select plants: Choose slow-growing species. Trim roots if needed.
- Set up stations: Arrange supplies in 4 zones (barrier layer, soil, plants, tools).
During the Lesson (45–60 minutes)
Step 1: Introduce the layers (5 min)
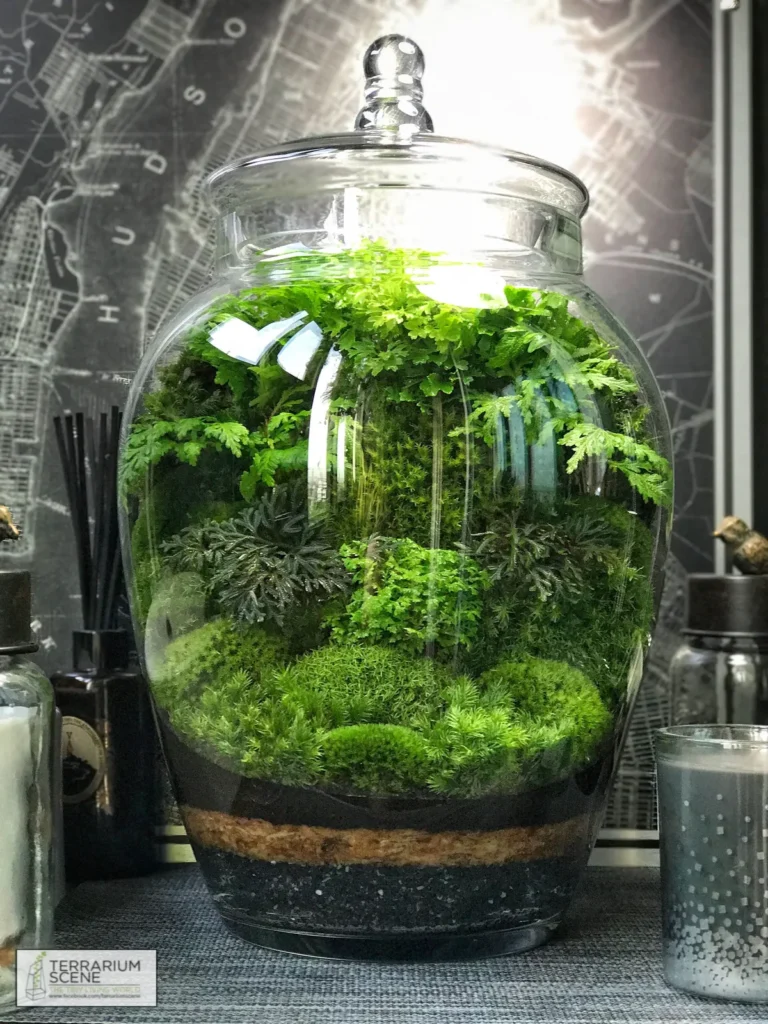
- Show a pre-made terrarium and point out the layers: barrier → soil → plants.
- Explain the purpose of each layer (e.g., “The gravel keeps the roots from sitting in water”).
Step 2: Build in groups (20 min)
- Divide students into groups of 3, 4. Assign roles:
, Layer expert: Adds gravel/charcoal.
, Soil scientist: Adds substrate.
, Plant biologist: Arranges plants.
, Water manager: Mists the terrarium (1, 2 sprays max).
- Circulate to troubleshoot (e.g., “Don’t pack the soil too tight, roots need air!”).
Step 3: Seal and observe (10 min)
- For closed terrariums: Secure the lid. For open terrariums: Leave uncovered.
- Have students predict what will happen in 1 week (e.g., “Will the glass fog up?”).
Step 4: Label and document (10 min)
- Students write their names on the jar and record initial observations.
- Take a “Day 1” photo for comparison later.
After the Lesson
- Light: Place terrariums in indirect sunlight. Avoid direct sun, it overheats closed systems.
- Maintenance: Assign a “terrarium monitor” each week to check for mold or dryness.
- Follow-up: Schedule a 5-minute observation at the start of each science class.
Pro tip for time-crunched teachers: Skip the charcoal for a 30-minute build. It’s not critical for short-term projects.
The Hidden Science Lessons in a Jar (Water Cycle, Decomposition, and More)
Terrariums don’t just grow plants, they grow understanding. Here’s how to turn observations into lessons:
Water Cycle: From Condensation to Rain
Closed terrariums are water-cycle labs in miniature. On a sunny morning, students will spot droplets forming on the glass. That’s evaporation and condensation in action.
By day three, the droplets disappear, only to reappear the next morning.
Lesson extension:
- Have students track condensation patterns over a week.
- Ask: “Why do droplets form on the glass but not the soil?”
- Compare it to Earth’s water cycle using a simple diagram.
Common misconception: Students often think the water “disappears” forever. Use a spray bottle to mist the terrarium and show how the water returns as droplets.
Decomposition: The Invisible Work of Fungi and Bugs
Leaf litter isn’t just decoration, it’s a decomposition lesson. Over weeks, students will notice leaves shrinking and turning brown. That’s fungi and bacteria breaking them down.
For advanced lessons:
- Add springtails or isopods to speed up decomposition.
- Have students sketch the leaf litter weekly to track changes.
- Discuss how this process recycles nutrients in forests.
Warning: If mold appears, it’s a teaching moment. Explain that mold is a decomposer, but too much can harm the plants. Learn how to fix overwatered terrariums here.
Photosynthesis: Light, CO2, and Oxygen
Terrariums make photosynthesis visible. Students can track how plants grow toward light sources. For a deeper dive, use a CO2 monitor to show how levels drop when plants photosynthesize.
Experiment idea:
- Cover half the terrarium with foil for a week.
- Compare plant growth in light vs. dark areas.
Carbon Cycle: A Sealed System
Closed terrariums demonstrate the carbon cycle. Plants absorb CO2 during the day and release oxygen. At night, they respire, releasing CO2 again.
Lesson tie-in:
- Use a carbon cycle diagram to connect the terrarium to global climate concepts.
Real Classroom Stories: What Worked (And What Crashed Spectacularly)
Not every terrarium project goes as planned. Here’s what teachers learned from real classroom setups:
Success Story: The Year-Long Ecosystem
Teacher: Ms. Rivera, 5th grade, Texas
Setup: Closed terrarium with fittonia, moss, and springtails.
Lesson: Water cycle and decomposition.
Outcome:
- Students tracked condensation daily for 9 months.
- The terrarium survived summer break with minimal intervention.
- Key to success: Placing it near a north-facing window to avoid overheating.
What went right:
- Used a barrier layer to prevent root rot.
- Added leaf litter to introduce decomposition naturally.
Failure Story: The Mold Explosion
Teacher: Mr. Patel, 3rd grade, London
Setup: Open terrarium with succulents.
Lesson: Plant adaptations.
Outcome:
- Within 2 weeks, white mold covered the soil.
- Students had overwatered, thinking “more water = healthier plants.”
- Lesson learned: Succulents need dry conditions.
What went wrong:
- No barrier layer led to waterlogged soil.
- Direct sunlight caused overheating, stressing the plants.
Fix: Switched to a closed terrarium with ferns, which thrived in the humid classroom.
Surprise Success: The Preschool Sensory Terrarium
Teacher: Ms. Chen, preschool, California
Setup: Open terrarium with moss and small rocks.
Lesson: Sensory exploration and fine motor skills.
Outcome:
- Students loved touching the moss and rearranging rocks.
- The terrarium lasted 6 months with minimal upkeep.
- Key to success: Using acrylic containers to prevent breakage.
The 3 Biggest Mistakes Teachers Make (And How to Avoid Them)
Most terrarium failures come down to three avoidable errors.
1. Overwatering: The Silent Killer
Problem: Teachers assume terrariums need frequent watering. In reality, closed systems recycle water, and open ones dry out quickly.
Signs of overwatering:
- Excessive condensation (closed terrariums).
- Mold or algae on soil.
- Yellowing leaves.
Fix:
- For closed terrariums: Water only when the soil feels dry (every 4, 6 months).
- For open terrariums: Mist lightly once a week.
- Use a spray bottle with a fine mist setting to avoid flooding the soil.
Pro tip: If you see mold, remove the lid for a day to let excess moisture escape. For severe cases, replace the top layer of soil.
2. Choosing the Wrong Plants
Problem: Not all plants thrive in terrariums. Succulents rot in closed systems, while ferns wilt in open ones.
Plant compatibility chart:
| Plant Type | Closed Terrarium | Open Terrarium | Why? |
|---|---|---|---|
| Ferns | ✅ Yes | ❌ No | Need high humidity. |
| Moss | ✅ Yes | ⚠️ Sometimes | Prefers humidity but adapts. |
| Fittonia | ✅ Yes | ❌ No | Wilts in dry air. |
| Succulents | ❌ No | ✅ Yes | Rot in high humidity. |
| Air plants | ❌ No | ✅ Yes | Need airflow. |
Fix:
- For closed terrariums, stick to tropical plants like ferns and fittonia.
- For open terrariums, use drought-tolerant species like succulents or air plants.
- Avoid plants to avoid in terrariums like herbs or fast-growing vines.
3. Ignoring Light Conditions
Problem: Too much or too little light stresses plants. Direct sunlight turns closed terrariums into greenhouses, while dim corners cause leggy growth.
Signs of light issues:
- Too much light: Brown, crispy leaves (sunburn).
- Too little light: Tall, spindly plants (etiolation).
Fix:
- Closed terrariums: Place in bright, indirect light (e.g., north-facing window).
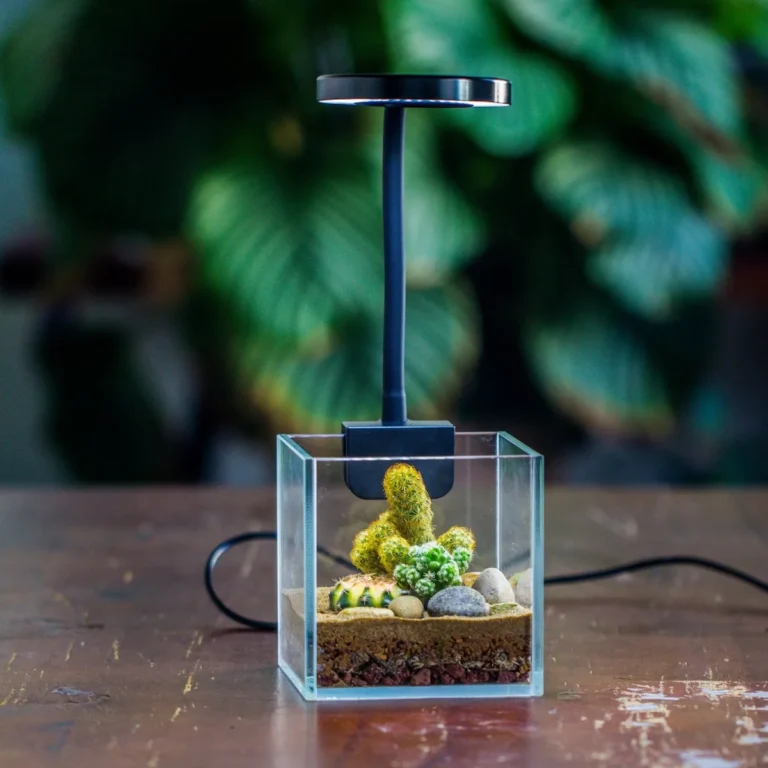
- Open terrariums: Use a south-facing window or supplement with grow lights.
- Rotate terrariums weekly to ensure even growth.
Pro tip: If your classroom lacks natural light, use a simple LED grow light. Set it on a timer for 6, 8 hours a day.
How to Keep a Terrarium Alive for a Full School Year
A terrarium isn’t a “set it and forget it” project, it’s a living system that needs occasional care.
Weekly Checklist
- Condensation check: For closed terrariums, wipe excess moisture off the glass if it blocks visibility.
- Mold inspection: Look for white fuzz or black spots on soil or plants.
- Plant health: Remove yellow or dead leaves to prevent rot.
- Light check: Ensure the terrarium isn’t in direct sunlight or complete shade.
Monthly Tasks
- Pruning: Trim overgrown plants to maintain balance.
- Soil refresh: Add a thin layer of fresh soil if the top layer looks depleted.
- Pest control: Check for fungus gnats or mites. Remove them manually or use a natural pest spray.
Seasonal Adjustments
- Winter: Move terrariums away from cold windows to prevent temperature swings.
- Summer: Avoid direct sunlight, which can overheat closed systems.
- Humid climates: Open terrariums may need less watering.
Troubleshooting Guide
| Problem | Cause | Fix |
|---|---|---|
| Excessive condensation | Overwatering or too much heat | Remove lid for 24 hours. |
| Mold on soil | Overwatering or poor airflow | Replace top layer of soil. |
| Yellow leaves | Overwatering or too much light | Adjust watering or move to shade. |
| Leggy plants | Not enough light | Move to brighter spot or add grow light. |
| Dry, crispy leaves | Underwatering or too much light | Mist lightly or move to indirect light. |
Pro tip: Assign a “terrarium monitor” each week to handle checks. It teaches responsibility and ensures the terrarium stays healthy.
Adapting Terrariums for Different Ages (Preschool to High School)
Terrariums work for all ages, you just need to adjust the complexity.
Preschool (Ages 3–5)
Focus: Sensory exploration and basic plant care.
Setup:
- Open terrarium with moss, rocks, and safe plants like air plants.
- Use acrylic containers to prevent breakage.
Activities:
- Touch and describe textures (soft moss, smooth rocks).
- Water the terrarium with a spray bottle (fine motor skills).
- Sing songs about plants or the water cycle.
Safety note: Avoid small parts that could be a choking hazard.
Elementary (Ages 6–10)
Focus: Observation and simple experiments.
Setup:
- Closed terrarium with ferns, moss, and leaf litter.
- Add a ruler to measure plant growth.
Activities:
- Track condensation patterns in a journal.
- Compare plant growth in light vs. dark areas.
- Introduce decomposers like springtails.
Lesson tie-in: Use the terrarium to teach the water cycle or plant life cycles.
Middle School (Ages 11–13)
Focus: Data collection and ecosystem dynamics.
Setup:
- Closed terrarium with fittonia, peperomia, and isopods.
- Add a hygrometer to measure humidity.
Activities:
- Graph plant growth over time.
- Test how different light levels affect condensation.
- Discuss cascade effects (e.g., “What happens if we remove the moss?”).
Lesson tie-in: Connect to climate change or nutrient cycles.
High School (Ages 14–18)
Focus: Advanced ecology and experimental design.
Setup:
- Multiple terrariums with different variables (light, humidity, plant types).
- Use sensors to track CO2, humidity, and temperature.
Activities:
- Design experiments (e.g., “How does pH affect plant growth?”).
- Model ecosystem collapse by introducing stressors (e.g., saltwater, overcrowding).
- Debate real-world applications (e.g., “Could terrariums help with space colonization?”).
Lesson tie-in: Tie to AP Environmental Science or biology standards.
Cross-Curricular Connections: Math, Art, and Writing with Terrariums
Terrariums bridge subjects in ways that stick with students.
Math connections:
- Measure plant growth weekly. Graph the data.
- Calculate soil volume using the container’s dimensions.
- Track humidity percentages with a hygrometer.
Art tie-ins:
- Sketch terrarium landscapes. Focus on textures and layers.
- Design miniature worlds with figurines or natural materials.
- Create stop-motion videos of plant growth over time.
Writing prompts:
- “Imagine you’re a water droplet in the terrarium. Describe your journey.”
- Write a persuasive letter to convince the principal to add more terrariums.
- Craft a story about a plant that escapes its jar.
Pro tip: Use terrariums to teach ratios. Mix soil components in different proportions and observe which plants thrive.
Budget Breakdown: How Much a Classroom Terrarium Really Costs
Costs vary, but terrariums can fit any budget.
DIY route:
- Jar: $0 (recycled) to $5 (dollar store).
- Gravel: $3 for a small bag.
- Soil: $4 for a quart.
- Plants: $2, $5 each (ask for cuttings or bulk discounts).
- Total: $10, $20 per terrarium.
Pre-made kits:
- Basic kits start at $25. They include plants and tools.
- Classroom sets (10+ terrariums) run $100, $200.
Hidden costs:
- Grow lights: $15, $30 if natural light is limited.
- Replacement plants: $5, $10 per year.
Where to save:
- Use free containers from recycling bins.
- Collect moss and rocks from nature.
- Partner with local nurseries for plant donations.
Troubleshooting Guide: Mold, Dying Plants, and Other Disasters
Mold is the most common issue. Here’s how to fix it.
Mold solutions:
- Remove the lid for 24 hours to reduce humidity.
- Replace the top layer of soil.
- Add springtails to eat mold spores.
Dying plants:
- Yellow leaves? Overwatering. Let the soil dry out.
- Brown tips? Too much light. Move to indirect sunlight.
- Leggy growth? Not enough light. Add a grow light.
Pest control:
- Fungus gnats? Let the soil dry between waterings.
- Mites? Wipe leaves with a damp cloth.
Pro tip: Keep a spray bottle of diluted hydrogen peroxide (1:10 ratio) for mold emergencies.
Lighting Hacks: Natural vs. Artificial for Classroom Setups
Natural light is ideal, but not all classrooms have it.
Natural light tips:
- North-facing windows provide steady, indirect light.
- Avoid south-facing windows. They overheat closed terrariums.
- Rotate terrariums weekly for even growth.
Artificial light solutions:
- LED grow lights work best. They’re energy-efficient.
- Set a timer for 6, 8 hours daily.
- Keep lights 6, 12 inches above the terrarium.
Warning: Incandescent bulbs generate too much heat. They’ll cook your plants.
Student Observation Journals: Templates and Tracking Ideas
Observation journals turn terrariums into long-term projects.
Template ideas:
- Daily log: Date, condensation level, plant height.
- Weekly sketch: Draw changes in plant growth.
- Monthly reflection: “What surprised you this month?”
Tracking tools:
- Use rulers to measure plant growth.
- Take weekly photos for comparison.
- Record humidity and temperature with sensors.
Pro tip: Assign roles. One student tracks water, another measures growth, a third sketches changes. Rotate weekly.
Beyond the Basics: Adding Decomposers and Mini “Animals”
Springtails and isopods turn terrariums into full ecosystems. These tiny creatures break down waste and prevent mold.
Springtails eat mold and decaying matter. They thrive in humid environments. Add 10, 20 to a closed terrarium for natural cleanup.
Isopods (pill bugs) handle larger debris. They need leaf litter to hide in. Start with 2, 3 per terrarium.
Safety note: Avoid millipedes or centipedes. They can harm plants and bite.
Pro tip: Buy cultures from reputable suppliers. Wild-caught bugs may carry pests.
Safety and Allergies: What to Watch Out For
Terrariums are safe but require precautions.
Allergies: Moss and soil can trigger reactions. Use gloves when handling materials. Keep terrariums away from students with mold allergies.
Glass safety: Use acrylic containers for young children. If using glass, tape the edges to prevent cuts.
Pest control: Fungus gnats are harmless but annoying. Let soil dry between waterings to deter them.
Warning: Never use pesticides. They can harm plants and students.
Where to Find Free or Cheap Terrarium Supplies
Local resources save money.
School gardens: Ask for plant cuttings or soil.
Nurseries: Many donate unsold plants or offcuts.
Recycling centers: Collect jars and containers.
Nature: Gather moss, rocks, and leaf litter. Sterilize in the oven at 200°F for 20 minutes.
Pro tip: Check community groups for free supplies. Parents often donate unused gardening materials.
Final Verdict: Is a Classroom Terrarium Worth the Effort?
Yes, if you plan ahead. Terrariums teach science, math, and art in one project. They engage students for months.
Best for: Teachers who want hands-on ecology lessons. Schools with limited outdoor space.
Challenges: Maintenance and plant selection. Avoid if your classroom lacks consistent light.
Bottom line: Start small. One terrarium can teach an entire unit. Expand as you gain confidence.
Frequently Asked Questions
How long does a classroom terrarium last?
With proper care, a closed terrarium can last 1, 3 years. Open terrariums typically last 6, 12 months before plants outgrow the container.
What’s the easiest plant for beginners?
Moss is the easiest. It grows slowly, tolerates low light, and thrives in high humidity. Fittonia is another good choice for closed terrariums.
Can terrariums survive summer break?
Yes, if you take precautions. Move them away from direct sunlight, and ensure closed terrariums have enough water before leaving. Open terrariums may need a quick mist before break.
How do I clean a moldy terrarium?
Remove the lid for 24 hours to reduce humidity. Replace the top layer of soil, and add springtails to eat mold spores. For severe cases, sterilize the container and start fresh.
Are terrariums safe for students with allergies?
Mostly, but take precautions. Avoid terrariums near students with mold or soil allergies. Use gloves when handling materials, and keep the terrarium in a well-ventilated area.
What’s the best container for young children?
Acrylic containers are safest. They’re shatterproof and lightweight. If using glass, tape the edges to prevent cuts.
Avoid containers with sharp edges.