
Moisture damage silently destroys homes every year, and most of it starts with one missing layer. The Barrier Layer: Why You Need It and What to Use explains how this simple but critical component keeps walls dry, energy bills low, and structures sound for decades.
Per ASTM E96 standards, a proper barrier must meet specific perm ratings to control vapor diffusion. Without it, condensation builds up inside walls, leading to mold, rot, and costly repairs.
Quick Answer
The barrier layer prevents moisture, air, and weather from damaging your home. It includes vapor barriers, air barriers, and weather barriers. Each type serves a distinct purpose in the building envelope.
Class I barriers block nearly all moisture, while Class II and III allow some drying.
What Is a Barrier Layer and Why Your Building Needs One
A barrier layer is a material or system that controls the movement of moisture, air, or water through a building’s structure. It’s a critical part of the building envelope, which separates the interior from the exterior environment.
Without a barrier layer, moisture from rain, ground water, or even indoor humidity can seep into walls, floors, and roofs. Over time, this leads to structural damage, mold growth, and reduced energy efficiency.
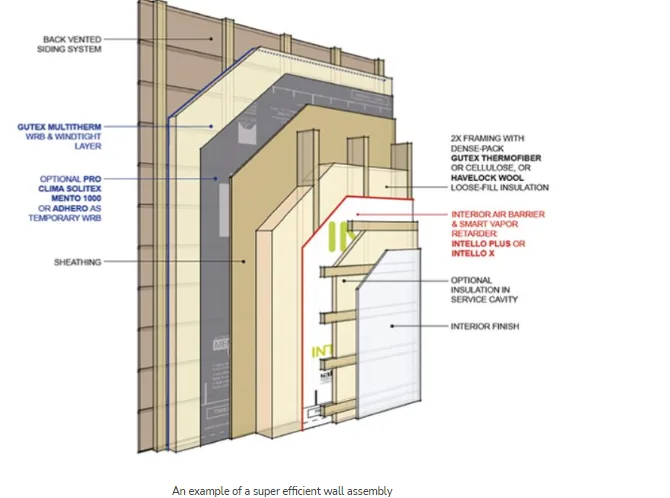
Manufacturer specifications and building codes often require barrier layers to meet specific performance standards, such as ASTM E1677 for water resistance or ASTM E96 for vapor permeability. Barrier layers also improve comfort by reducing drafts and maintaining consistent indoor temperatures.
The 3 Types of Barrier Layers (and When to Use Each)
Not all barrier layers serve the same purpose. The three main types, vapor barriers, air barriers, and weather barriers, each address different threats to your building’s integrity.
Vapor barriers control moisture diffusion through materials like walls and floors. They’re classified by perm ratings:
- Class I (≤ 0.1 perm): True vapor barriers, like polyethylene sheeting, block nearly all moisture.
- Class II (0.1, 1.0 perm): Vapor retarders, such as kraft-faced fiberglass, slow moisture movement.
- Class III (1.0, 10 perm): Permeable materials, like latex paint, allow some drying.
Use Class I in cold climates to prevent condensation inside walls. In mixed or hot-humid climates, Class II or III may be better to allow moisture to escape.
Air barriers stop air leakage through gaps and cracks in the building envelope. They can be membranes, spray foam, or even carefully sealed drywall. These barriers improve energy efficiency by preventing drafts and reducing heating/cooling loads.
Weather barriers protect against rain, wind, and UV exposure. Common examples include house wraps like Tyvek or Typar, which are breathable yet water-resistant.
Vapor Barriers vs. Vapor Retarders: Perm Ratings Explained
The difference between a vapor barrier and a vapor retarder comes down to perm ratings, which measure how much water vapor can pass through a material. The lower the perm rating, the less moisture gets through.
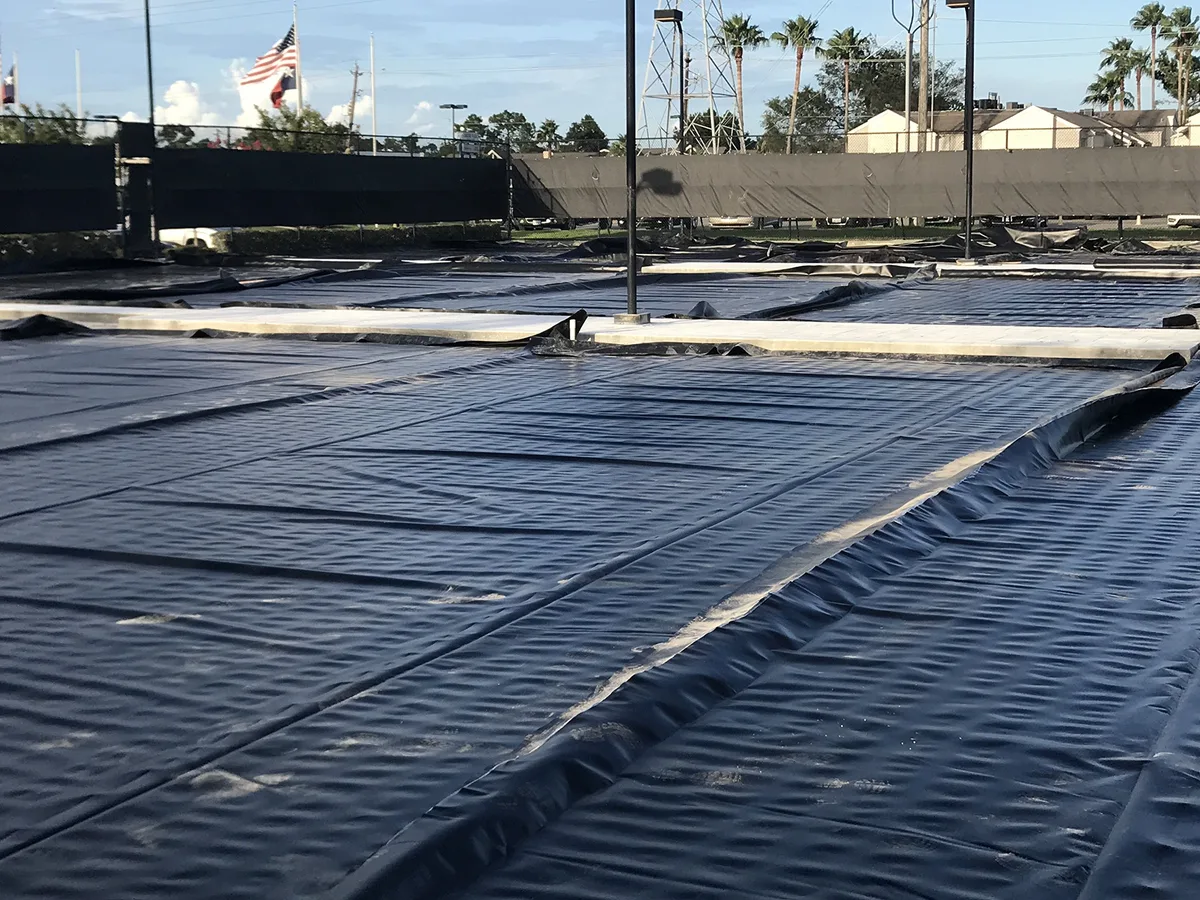
Vapor barriers (Class I, ≤ 0.1 perm): These are impermeable materials like polyethylene sheeting or rubberized asphalt. They’re ideal for cold climates where preventing moisture from entering the wall cavity is critical.
Vapor retarders (Class II, 0.1, 1.0 perm): Materials like kraft paper or foil-faced insulation slow moisture diffusion but still allow some drying. They’re a good middle ground for mixed climates where both moisture control and breathability are needed.
Permeable materials (Class III, 1.0, 10 perm): These include latex paint or certain house wraps. They’re often used in hot-humid climates where allowing moisture to escape is more important than blocking it.
Per International Residential Code (IRC) guidelines, the placement of vapor barriers depends on your climate zone. In cold zones (5, 8), the barrier should be on the interior side of the insulation. In warm-humid zones (1, 2), a permeable material or no barrier at all may be recommended to allow drying.
Moisture Barriers: Materials, Pros, and Best Applications
Moisture barriers are designed to prevent water in liquid form from entering a structure. They’re essential in areas prone to rain, flooding, or high groundwater levels.
| Material | Best For | Pros | Cons |
|---|---|---|---|
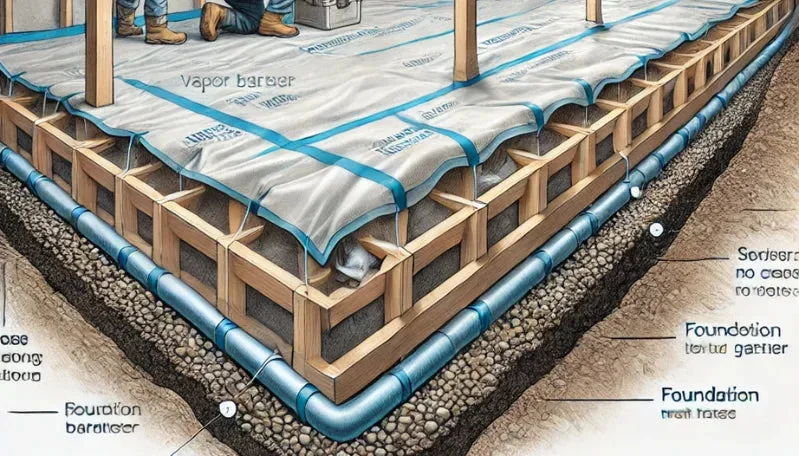
| Polyethylene sheeting | Basements, crawl spaces, under slabs | Low cost, easy to install | Can tear, not UV-resistant |
| Rubberized asphalt | Roofs, foundations | Durable, self-sealing around fasteners | Higher cost, requires professional install |
| Modified bitumen | Flat roofs, commercial buildings | Long lifespan, high water resistance | Heavy, needs heat for installation |
| Liquid-applied membranes | Complex surfaces, repairs | Seamless, conforms to irregular shapes | Requires proper surface prep |
| Cementitious waterproofing | Concrete walls, basements | Strong bond, resistant to hydrostatic pressure | Rigid, can crack under movement |
Polyethylene sheeting is the most common choice for residential applications due to its affordability and ease of use. For below-grade applications, like basements, rubberized asphalt or liquid-applied membranes are often preferred for their durability and water resistance.
In commercial settings, modified bitumen is a popular choice for flat roofs because of its ability to withstand ponding water and extreme temperatures.
Air Barriers: How They Stop Drafts and Save Energy
Air barriers are designed to prevent the uncontrolled flow of air through a building’s envelope. Unlike vapor barriers, which focus on moisture, air barriers target air leakage, which can account for up to 30% of a home’s heating and cooling energy loss according to the U.S. Department of Energy.
Common air barrier materials include:
- House wraps: Breathable membranes like Tyvek or Typar that block air but allow moisture to escape.
- Spray foam insulation: Closed-cell foam acts as both insulation and an air barrier when applied continuously.
- Rigid foam boards: Installed on the exterior of sheathing, these provide a continuous air barrier when taped and sealed properly.
- Sealed drywall: In some cases, drywall can act as an air barrier if all seams, edges, and penetrations are properly sealed with caulk or tape.
The key to an effective air barrier is continuity. Gaps, seams, or penetrations must be sealed with compatible tapes, mastics, or gaskets. For example, electrical outlets, plumbing penetrations, and window/door frames are common leakage points that need attention.
Air barriers also improve indoor air quality by reducing the infiltration of dust, pollen, and outdoor pollutants. They work hand-in-hand with vapor barriers and weather barriers to create a complete building envelope. For best results, follow the Air Barrier Association of America’s guidelines on installation and testing.
Weather Barriers: Protecting Against Rain, Wind, and UV
Weather barriers are the first line of defense against external elements. They’re designed to shed water, block wind, and resist UV damage while still allowing moisture vapor to escape. This breathability prevents trapping moisture inside walls, which can lead to rot or mold.
Common weather barrier materials include house wraps like Tyvek or Typar, which are made from spun-bonded polyolefin. These materials are lightweight, tear-resistant, and easy to install. They’re typically installed directly over the sheathing and under the siding or brick.
For roofs, self-adhered membranes like Grace Ice & Water Shield provide a secondary layer of protection against leaks. These are especially important in cold climates where ice dams can force water under shingles. Manufacturer specs confirm these membranes remain flexible in temperatures as low as -40°F.
How to Choose the Right Barrier for Your Climate Zone
Climate plays a major role in determining which barrier layer you need. The International Residential Code (IRC) divides the U.S. into climate zones, each with specific recommendations for vapor barrier placement and perm ratings.
In cold climates (Zones 5, 8), vapor barriers should be installed on the interior side of the insulation. This prevents warm, moist indoor air from condensing inside the wall cavity. Class I vapor barriers like polyethylene sheeting are often used here.
In mixed climates (Zones 3, 4), a vapor retarder (Class II) is usually sufficient. These allow some drying while still controlling moisture diffusion. Smart vapor barriers, which adjust their perm rating based on humidity, are also gaining popularity in these zones.
In hot-humid climates (Zones 1, 2), the priority shifts to allowing moisture to escape. Permeable materials (Class III) or no vapor barrier at all may be recommended. The focus here is on weather barriers to keep bulk water out while letting the structure breathe.
For the most accurate guidance, consult the IRC climate zone map or local building codes. These resources provide tailored recommendations based on your specific region’s temperature and humidity patterns.
Step-by-Step: Installing a Barrier Layer Correctly
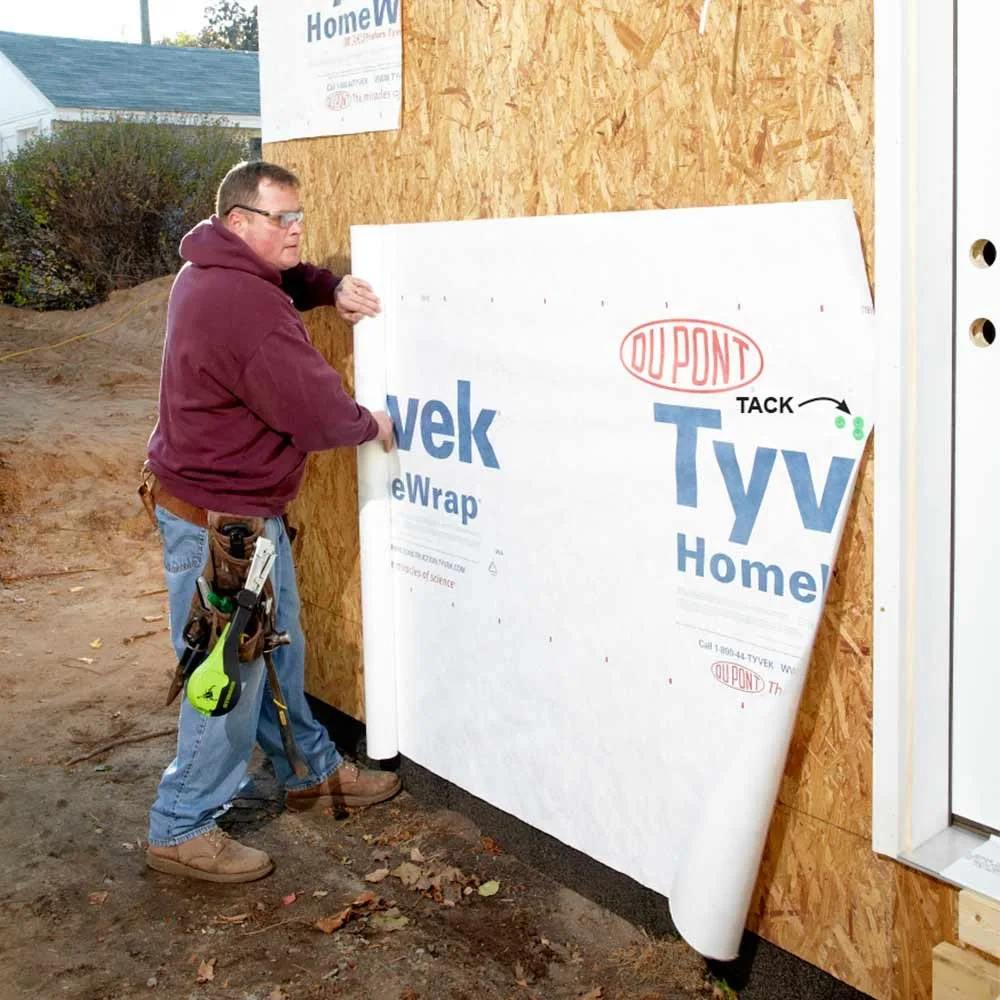
Proper installation is critical to ensuring your barrier layer performs as intended. Follow these steps for a typical house wrap installation, which serves as both a weather and air barrier.
1. Prepare the surface
Remove any debris, dust, or protruding fasteners from the sheathing. The surface should be clean, dry, and smooth. Repair any gaps or cracks in the sheathing with appropriate materials.
2. Start at the bottom
Begin installing the house wrap at the bottom of the wall, working your way up. Overlap each horizontal row by at least 6 inches to ensure water sheds downward and doesn’t seep behind the barrier.
3. Secure the wrap
Use cap nails or staples to fasten the wrap to the sheathing. Space fasteners every 12 to 18 inches along the edges and every 24 inches in the field. Avoid over-driving fasteners, which can tear the material.
4. Seal the seams
Apply manufacturer-approved tape over all horizontal and vertical seams. This ensures continuity and prevents air and water infiltration. Pay special attention to corners, window openings, and door frames.
5. Integrate with other components
Seal around all penetrations, such as electrical outlets, plumbing vents, and utility lines. Use flashing tape or liquid-applied sealants compatible with the house wrap. Ensure the barrier layer connects properly to the roof underlayment and foundation.
6. Install siding or brick
Apply the exterior finish material over the house wrap. Leave a small gap between the siding and the wrap to allow for drainage and drying.
Common Barrier Layer Mistakes (and How to Avoid Them)
Even small errors during installation can compromise the effectiveness of your barrier layer. Here are the most common mistakes and how to prevent them.
Using the wrong perm rating for your climate
Installing a Class I vapor barrier in a hot-humid climate can trap moisture inside walls, leading to mold and rot. Always check the IRC climate zone map and choose a barrier with the appropriate perm rating.
Improper sealing of seams and penetrations
Gaps or poorly sealed seams allow air and water to bypass the barrier. Use manufacturer-approved tapes and sealants, and follow the recommended overlap distances.
Installing the barrier on the wrong side of the wall
In cold climates, the vapor barrier should be on the interior side of the insulation. Installing it on the exterior side can lead to condensation within the wall cavity. Double-check local building codes for guidance.
Puncturing the barrier during installation
Fasteners, tools, or sharp edges can tear the barrier layer. Handle materials carefully, and use cap nails or staples designed for house wrap to minimize damage.
Failing to integrate with other building components
The barrier layer must connect seamlessly with the roof, foundation, windows, and doors. Use compatible flashing and sealants to maintain continuity and prevent leaks.
Barrier Layer Costs: What to Expect by Type and Size
The cost of a barrier layer varies depending on the material, the size of your project, and whether you hire a professional. Below is a general cost breakdown for common barrier types.
| Barrier Type | Cost per Square Foot | Notes |
|---|---|---|
| Polyethylene sheeting | $0.20–$0.50 | DIY-friendly, low cost |
| House wrap (Tyvek/Typar) | $0.30–$0.80 | Includes labor if professionally installed |
| Liquid-applied membrane | $0.50–$2.00 | Cost varies by thickness and coverage |
| Self-adhered membrane | $1.00–$3.00 | Often used for roofs or foundations |
| Modified bitumen | $2.00–$5.00 | Professional installation recommended |
For an average 2,500 sq. ft. home, the total cost for a house wrap installation typically ranges from $750 to $2,000, including labor. Liquid-applied membranes and self-adhered systems can push the cost higher, especially for complex surfaces.
Labor costs also vary by region and project complexity. In areas with high demand or strict building codes, expect to pay more for professional installation.
Building Code Requirements for Barrier Layers
Building codes exist to ensure barrier layers perform as intended. The International Residential Code (IRC) and International Energy Conservation Code (IECC) provide the primary guidelines for residential construction in the U.S.
The IRC specifies vapor barrier requirements based on climate zone. In Zones 5 through 8, a Class I or II vapor retarder is required on the interior side of frame walls. In Zones 1 through 3, vapor barriers are often optional or may require a Class III material to allow drying.
The IECC focuses on air barriers, requiring continuous air sealing in the building envelope. This includes sealing around windows, doors, electrical outlets, and plumbing penetrations. The code also mandates that air barriers be durable and compatible with other building materials.
Local amendments may add stricter requirements. For example, coastal areas prone to hurricanes often require enhanced weather barriers to resist wind-driven rain. Always check with your local building department for specific regulations.
Maintenance and Long-Term Care for Your Barrier System
A well-installed barrier layer requires minimal maintenance, but periodic checks can prevent costly issues. Inspect your barrier system at least once a year, particularly after severe weather events.
Look for signs of damage such as tears, punctures, or gaps in the material. Pay special attention to areas around windows, doors, and roof penetrations, where water is most likely to intrude. If you find damage, repair it promptly with compatible tapes or sealants.
For liquid-applied membranes, check for cracks or peeling. These may indicate UV degradation or improper surface preparation during installation. Reapply the membrane as needed, following manufacturer guidelines.
In basements or crawl spaces, monitor humidity levels. If you notice persistent moisture or musty odors, it may signal a failure in your vapor barrier. Consider installing a dehumidifier or improving ventilation to address the issue.
Use Cases / Best For / Who It’s Right For
Barrier layers serve different purposes depending on the building type and location. Understanding the specific use cases helps you choose the right system for your needs.
Residential homes benefit from a combination of vapor, air, and weather barriers. In cold climates, a Class I vapor barrier on the interior side of walls prevents condensation. House wraps provide weather protection while allowing moisture to escape.
Commercial buildings often require more robust systems. Modified bitumen or liquid-applied membranes are common for flat roofs, where ponding water is a concern. Air barriers are critical in large structures to improve energy efficiency and indoor air quality.
Historic or older homes may need special consideration. Retrofitting a barrier layer can be challenging due to existing construction methods. In these cases, a breathable weather barrier like house wrap may be the best option to balance moisture control and preservation.
DIY projects such as sheds or small additions can use simpler barrier systems. Polyethylene sheeting or self-adhered membranes are often sufficient for these applications. However, always follow manufacturer instructions and local codes.
Mistakes to Avoid / Common Errors
Even experienced builders can make mistakes with barrier layers. Avoiding these common errors ensures your system performs as intended.
Skipping the barrier layer entirely
Some builders assume that insulation alone is sufficient. Without a barrier layer, moisture can still penetrate walls, leading to mold, rot, and reduced insulation effectiveness.
Using incompatible materials
Not all barrier layers work well together. For example, pairing a non-breathable vapor barrier with a non-breathable exterior finish can trap moisture inside walls. Always check manufacturer recommendations for compatibility.
Ignoring manufacturer instructions
Each barrier material has specific installation requirements. For instance, some liquid-applied membranes require a primer, while others do not. Failing to follow these instructions can void warranties and reduce performance.
Overlooking details
Small gaps or improperly sealed seams can compromise the entire barrier system. Pay close attention to corners, edges, and penetrations. Use manufacturer-approved tapes and sealants to ensure continuity.
Final Decision Guide: Which Barrier Layer Is Right for You?
Choosing the right barrier layer depends on your climate, building type, and specific needs. Use this guide to make an informed decision.
For cold climates (Zones 5, 8):
Use a Class I vapor barrier on the interior side of walls. Pair it with a breathable weather barrier like house wrap to protect against wind and rain.
For mixed climates (Zones 3, 4):
A Class II vapor retarder is usually sufficient. Consider a smart vapor barrier that adjusts its perm rating based on humidity levels.
For hot-humid climates (Zones 1, 2):
Opt for a permeable material (Class III) or no vapor barrier at all. Focus on a high-quality weather barrier to keep bulk water out while allowing the structure to breathe.
For roofs:
Use a self-adhered membrane like Grace Ice & Water Shield in cold climates to prevent ice dams. In warmer areas, a modified bitumen or liquid-applied membrane may be more appropriate.
For basements and crawl spaces:
Polyethylene sheeting or rubberized asphalt membranes provide effective moisture control. Ensure the barrier is properly sealed and integrated with the foundation drainage system.
Frequently Asked Questions
What is the difference between a vapor barrier and a moisture barrier?
A vapor barrier controls moisture in its gaseous form, preventing it from diffusing through walls. A moisture barrier blocks liquid water from entering a structure. Some materials, like rubberized asphalt, can serve both purposes.
Do I need a vapor barrier in a hot climate?
In hot-humid climates, a Class I vapor barrier can trap moisture inside walls. A permeable material (Class III) or no vapor barrier at all is often recommended to allow drying. Focus on a weather barrier to keep bulk water out.
Can I install a barrier layer myself?
Yes, many barrier layers like house wrap or polyethylene sheeting are DIY-friendly. However, follow manufacturer instructions carefully. For complex systems like liquid-applied membranes or modified bitumen, professional installation is often recommended.
How long does a barrier layer last?
The lifespan varies by material. Polyethylene sheeting typically lasts 10, 20 years if protected. Modified bitumen and liquid-applied membranes can last 20, 30 years or more with proper maintenance.
What happens if I don’t use a barrier layer?
Without a barrier layer, moisture can seep into walls, floors, and roofs. This leads to structural damage, mold growth, reduced insulation effectiveness, and higher energy bills. Over time, it can compromise the integrity of your entire building.