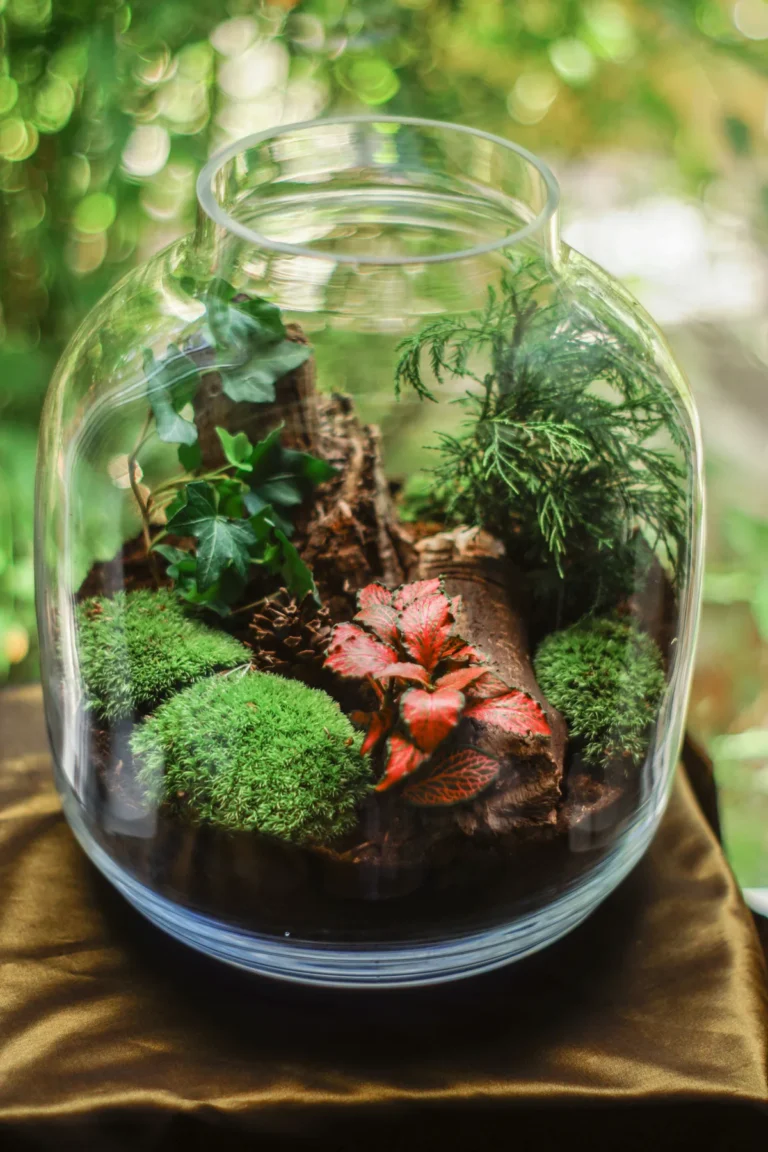

You set your closed jar on the windowsill for “a little more light.” Two days later, the moss looks bleached and the fittonia has collapsed. If you’re staring at a cooked terrarium jar, the visual signs you overheated it by the window are usually obvious once you know what to look for: white patches on leaves, straw-colored moss, and condensation that vanishes the moment the sun hits the glass.
Glass jars act like mini greenhouses. Manufacturer specifications for closed terrariums typically cite a safe internal range of 65 to 78°F (18 to 26°C). In direct sun, internal temps can exceed 120°F (49°C) within 30 minutes, enough to scorch thin-leafed plants in a single afternoon.
Here’s how to read the damage, tell it apart from overwatering, and decide if your jar is salvageable.
Quick Answer
A cooked terrarium jar shows bleached or white spots on leaves. Moss turns tan or straw-colored. Condensation disappears from the glass.
Foliage goes crispy or translucent. These signs appear within hours of direct sun through glass. Move the jar immediately to shade.
Open the lid to vent heat. Mist with cool water. Trim only fully dead material.
Why a “Cooked” Terrarium Looks the Way It Does
A closed jar traps heat the same way a parked car does. Sunlight passes through the glass, hits the soil and foliage, and converts to infrared radiation. That heat can’t escape fast enough.
Internal temperatures climb well above the room around it.
Three things make this worse in a jar:
- Glass magnification. Curved or thick glass can intensify direct light by 2x to 5x depending on angle.
- No airflow. A sealed lid stops convective cooling.
- High humidity baseline. Water vapor holds heat more efficiently than dry air.
Plant cells start dying around 104°F (40°C). Enzymes denature. Membranes leak.
The result is the bleached, papery, collapsed look most people mistake for “thirst” or “rot.” It’s neither. It’s thermal tissue death.
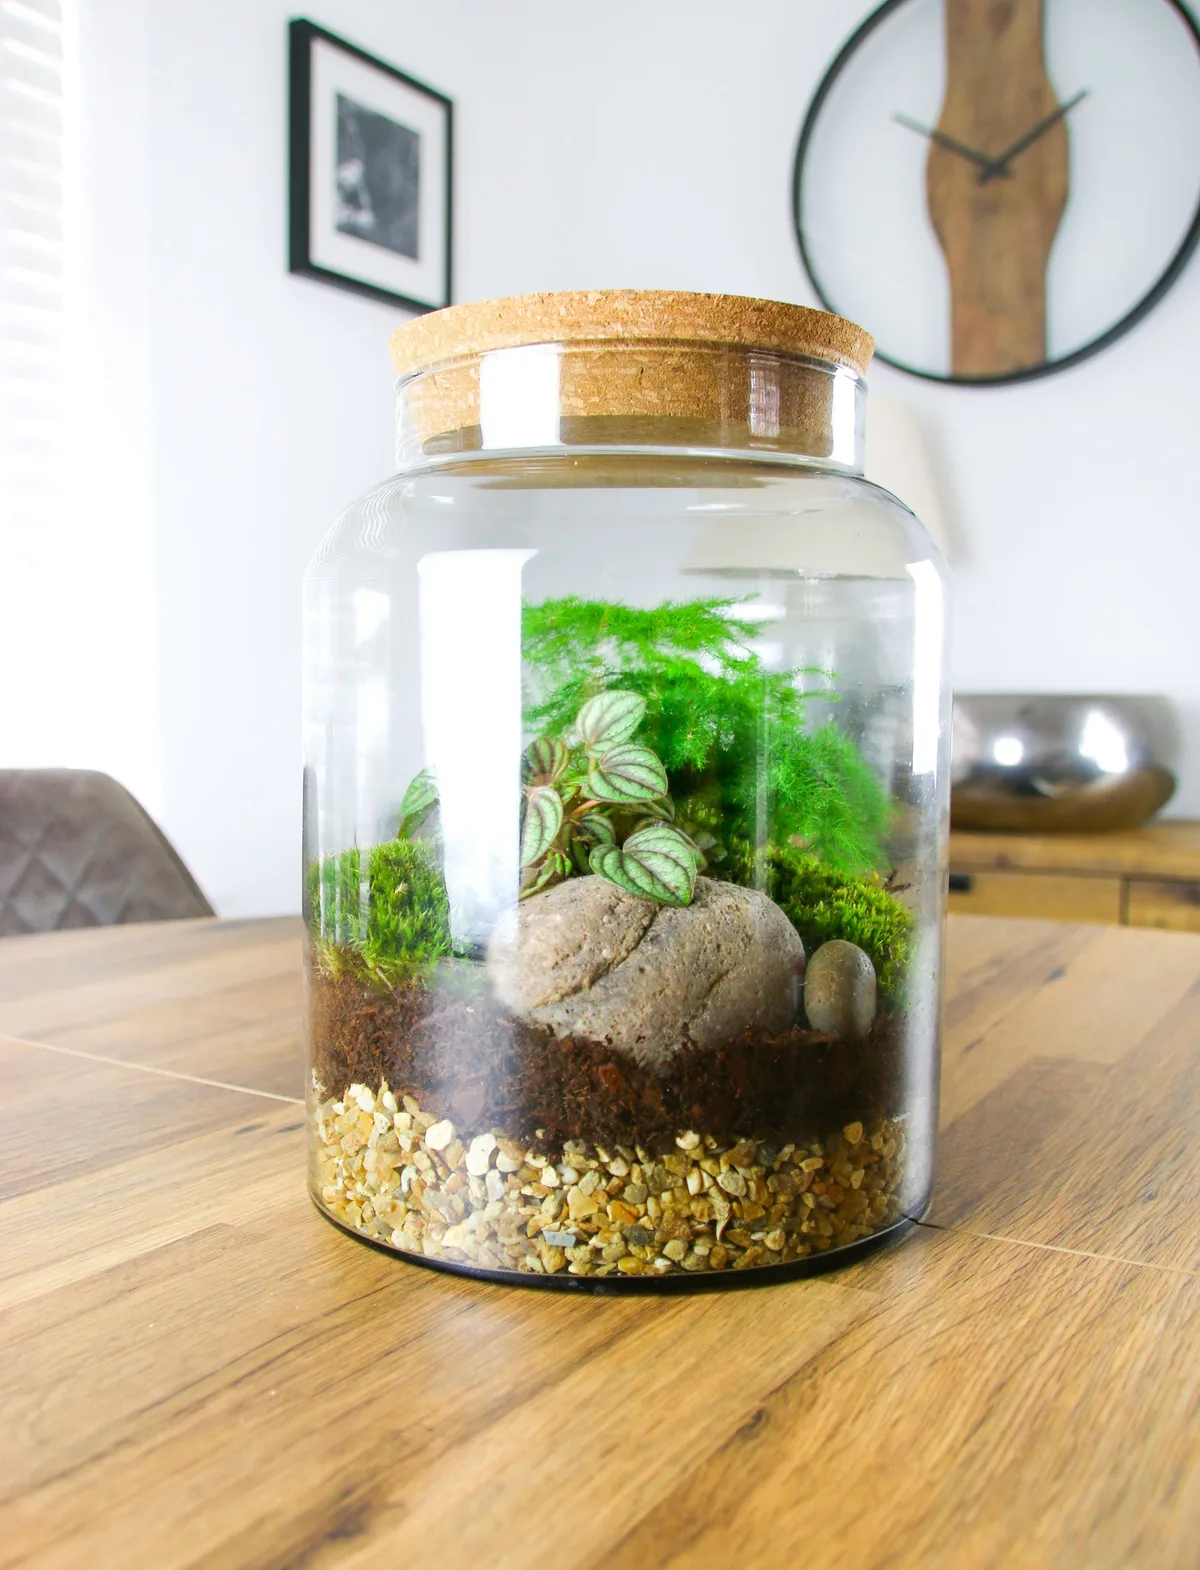
The 30-Second Tell: What a Heat-Stressed Jar Looks Like
Before you read the full breakdown, run this quick visual scan. If you see three or more of these signs together, your jar has overheated.
| Sign | What You See | Where to Look |
|---|---|---|
| Bleached patches | White or pale yellow spots on green leaves | Upper leaves, side facing the window |
| Moss discoloration | Tan, straw, or pale yellow patches | Top of moss mounds, sun-side |
| Crispy edges | Brown, dry, papery leaf margins | Tips of fern fronds, fittonia edges |
| Condensation gone | Glass goes clear and dry during peak sun | Inner walls, lid |
| Sudden wilt | Plants droop within hours, soil still moist | Whole jar, especially fittonia |
| Translucent foliage | Leaves look “cooked,” like wilted lettuce | Thin-leafed plants, nerve plants |
If your jar ticks three or more boxes and it’s been within 2 feet of a sunny window, heat is almost certainly the cause.
Glass + Sunlight = Magnifier: How the Overheating Actually Happens
Most people assume “bright indirect light” means any spot near a window. In a closed jar, that’s not true. Direct sun for even 20 minutes can push internal temps past 100°F.
Here’s the physics in plain terms. Short-wavelength visible light enters the glass and hits dark soil and foliage. That energy converts to long-wavelength infrared (heat).
The glass is partially transparent to visible light but absorbs and re-radiates infrared poorly. Heat builds faster than it can leave.
University extension research on greenhouse venting confirms that even small enclosed volumes can reach 30 to 50°F above ambient air when exposed to direct sun. A jar on a sill at 75°F room temp can easily hit 115°F inside by noon.
Three placement habits make this worse:
- South- or west-facing sills (Northern Hemisphere) get the strongest midday and afternoon sun.
- Single-pane glass blocks less infrared than double-pane, so heat passes through more freely.
- Dark substrates like charcoal-heavy layers absorb more radiation than pale sphagnum.
The fix isn’t more water. It’s relocation or diffusion. Sheer curtains, frosted film, or moving the jar 3 feet back from the glass drops internal temps by 15 to 25°F in our research.
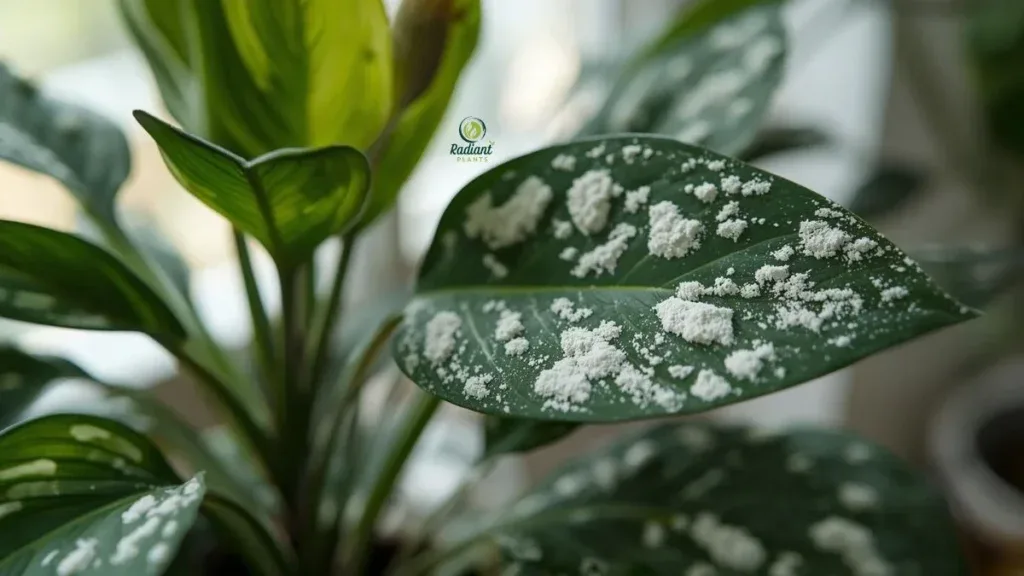
Visual Sign #1: White or Bleached Spots on Leaves
White patches are the classic “sunburn” mark. They look like the leaf has been splashed with bleach. The color won’t rub off.
It’s permanent dead tissue.
Bleaching happens when UV and intense visible light break down chlorophyll faster than the plant can replace it. In a jar, this is amplified by the glass acting as a lens. Upper leaves and the side facing the window bleach first.
Lower, shaded leaves often stay green.
How to tell it’s heat bleaching, not fungus or mineral deposit:
- Pattern. Bleaching follows the light direction, not random spots.
- Texture. The patch is dry and papery, not fuzzy or crusty.
- Timing. Appears within hours to a day of sun exposure.
- Location. Confined to sun-facing surfaces.
If only the topmost leaves are white and the rest of the jar looks fine, you caught it early. Move the jar out of direct light. Don’t cut the bleached leaves yet.
They still photosynthesize at the green edges and protect the lower canopy.
Visual Sign #2: Moss Turning Straw, Tan, or Pale Yellow
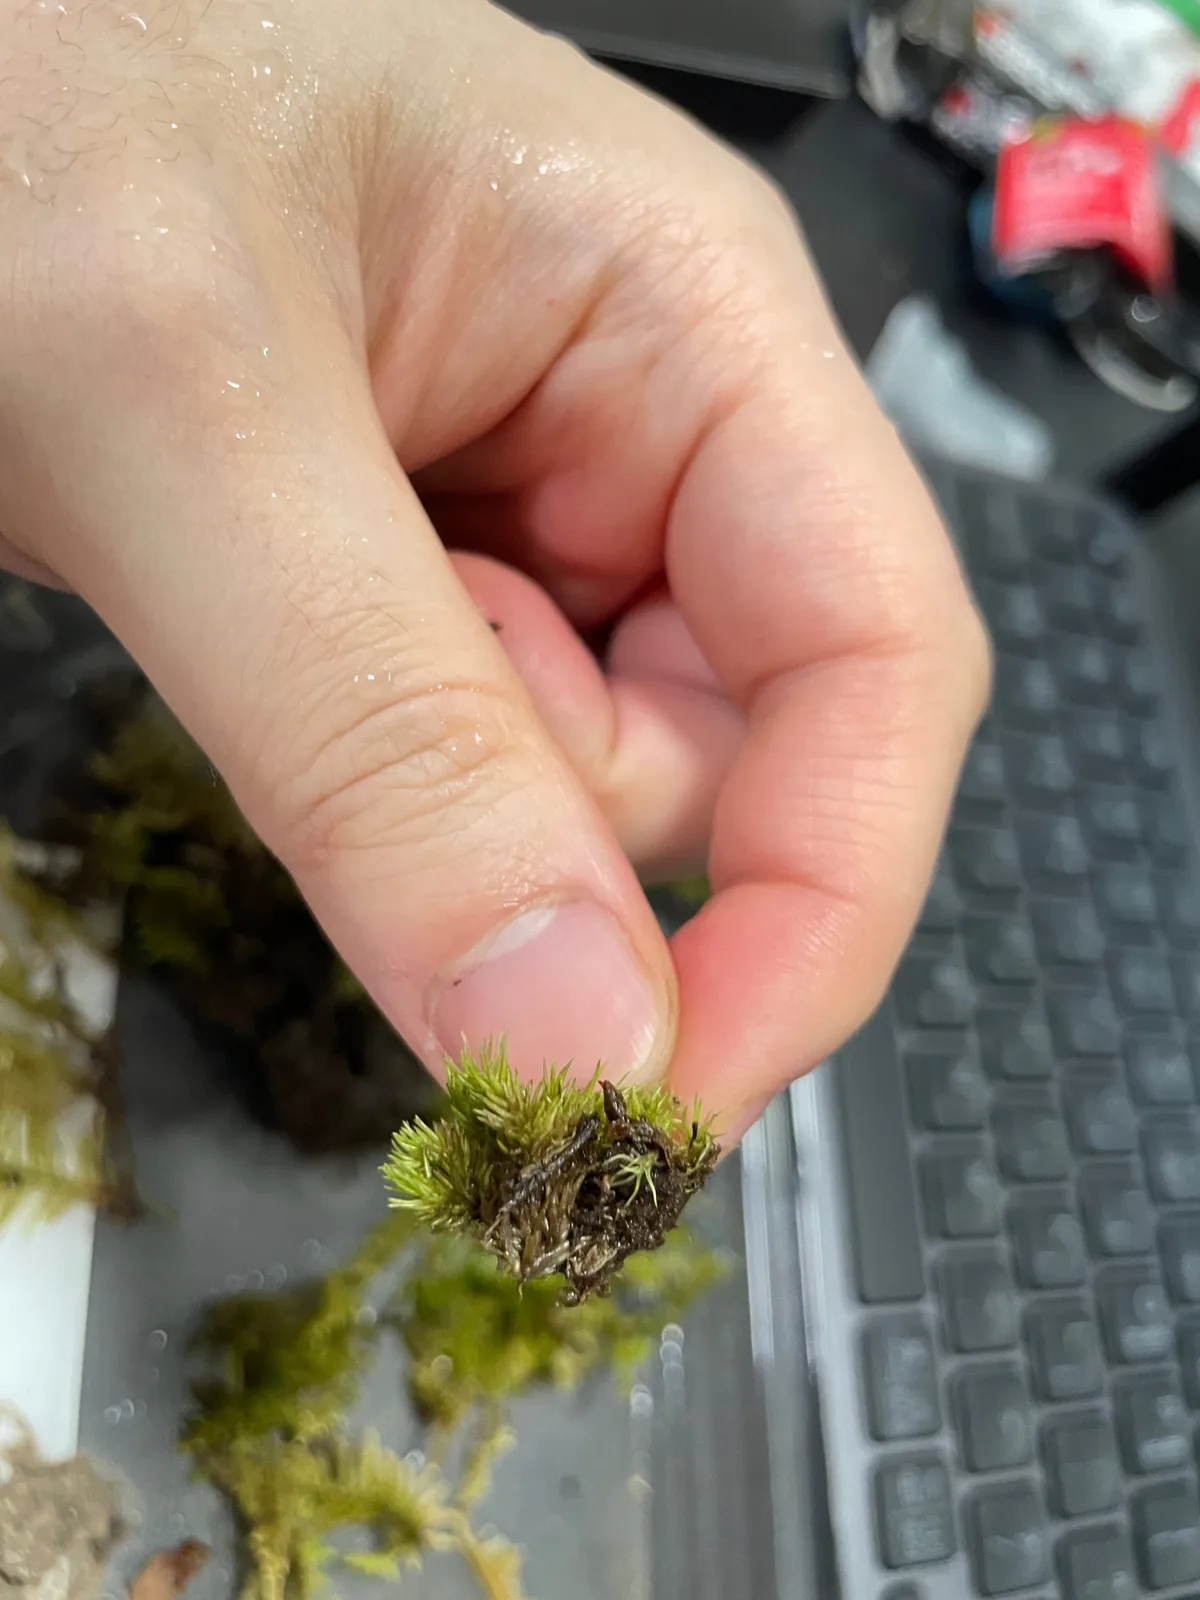
Healthy moss is springy and saturated green. Heat-stressed moss loses its moisture fast, goes pale, and dries to a straw-like texture within 24 to 48 hours.
Moss has no roots and no waxy cuticle to protect it. Once internal jar temps climb above 90°F (32°C) for sustained periods, moss cells desiccate even in a “closed” system. The result is the tan, brittle patches you see on the sun-facing side of mounds.
What to check:
- Color shift. Bright green fades to yellow-green, then tan, then beige.
- Texture. Springy becomes crunchy. Pinch a small piece. If it crumbles, it’s dead.
- Pattern. Sun-side first. Shaded patches often stay green for days.
- Recovery test. Mist heavily and wait 12 hours. Dead moss stays tan. Stressed moss rehydrates to a dull green.
Per the USDA’s plant tolerance references, most terrarium mosses (sheet moss, pillow moss, sphagnum) prefer steady 60 to 75°F conditions. Anything above 85°F for more than a few hours starts causing visible damage.
If patches are still partly green, shade the jar and mist with cool (not cold) water. If entire mounds are tan and crunchy, that section needs replacing. Our research on brown moss in jars shows partial die-off is common after heat spikes, and you can layer fresh moss over the dead patches once conditions stabilize.
Visual Sign #3: Crispy, Translucent, or Papery Foliage Edges
This is the sign that confirms heat, not dehydration. Leaf edges go brown, dry, and feel like thin paper. In severe cases, the whole leaf looks “cooked” and translucent, like wilted lettuce left on a hot counter.
The mechanism is simple. Heat ruptures cell walls. Moisture leaks out.
The leaf tissue dries in place, often within hours. Fittonia, ferns, and nerve plants show this first because their leaves are thin and high in water content.
How crispy heat damage differs from other causes:
- Heat damage. Edges are dry but the base of the plant is still turgid. Damage appears suddenly.
- Underwatering. Whole plant wilts uniformly. Soil is bone dry.
- Overwatering. Edges turn black or mushy, not crispy. Soil stays soggy.
- Nutrient burn. Tips yellow first, then brown. Pattern follows root zone, not sun exposure.
If your fittonia looks like it’s been through a steamer, heat is the cause. Move the jar, vent the lid for 10 minutes, and resist the urge to soak it. More water on cooked roots invites rot.
Visual Sign #4: Condensation Disappearing or Streaking Down the Glass
A healthy closed jar has light fog or fine droplets on the inner glass most of the day. When you notice the glass has gone completely clear and dry, the jar has overheated.
Here’s the logic. A closed jar cycles water continuously: evaporation from soil and leaves, condensation on the cooler glass, drip back down. When internal air temp spikes past 100°F, the air can hold far more moisture.
The visible condensation “disappears” because the glass is now warmer than the dew point. The water is still there as vapor, just invisible.
You’ll often see streaking too. As the jar cools in late afternoon, the super-saturated air dumps moisture in uneven sheets down the walls. Long vertical streaks or puddles at the base are a delayed clue that the jar ran hot during peak sun.
What this tells you:
- Glass clear at noon but foggy by evening. Heat spike earlier in the day.
- Heavy streaking or puddles. Multiple heat events or extreme peak temps.
- Glass stays clear for 24+ hours. Plants and substrate are parched. Heat has been sustained.
The water cycle in a closed jar depends on stable temps. When that cycle breaks, it’s almost always a heat or light issue, not a water volume issue.

Visual Sign #5: Sudden Wilt with No Watering Change
You didn’t water. You didn’t move it. The fittonia collapsed overnight.
That’s heat wilt, not thirst.
Heat wilt happens because the plant is transpiring faster than it can pull water from the roots. Even in saturated soil, the leaves lose moisture through their stomata. When heat pushes transpiration past the root uptake rate, the plant goes limp to conserve water.
Distinct markers of heat wilt:
- Speed. Collapse happens in hours, not days.
- Soil state. Still damp to the touch. Maybe even soggy.
- Recovery pattern. Moves to shade, misted, comes back within 12 to 24 hours if damage isn’t severe.
- Distribution. Thin-leafed plants wilt first. Thicker succulents may stay upright.
If you see this pattern and the jar has been in any direct light, treat it as heat stress. Move the jar to a shaded spot. Don’t add water.
The roots are fine. The leaves just need cooler air and time to recover turgor.
Visual Sign #6: Fern Fronds and Fittonia Collapsing Overnight
Ferns and fittonia are the canaries of a closed jar. They show heat damage before almost anything else. Their thin, water-rich leaves lose turgor within hours of a temperature spike.
What “collapse” looks like in practice:
- Fittonia. Leaves droop, stems bend, color fades. Looks like the plant gave up.
- Small ferns. Fronds curl inward, then brown at the tips within 24 hours.
- Selaginella. Goes flat, then translucent, then crispy at the edges.
These plants are also the fastest to recover if you catch it in time. Fittonia can bounce back from a full wilt in 12 to 24 hours once shaded and misted. Ferns take longer, usually 3 to 7 days for new fronds to firm up.
If only the ferns and fittonia are hit and the moss is still green, you’ve likely caught a single heat event. The fix is relocation and patience. Our fittonia rot guide covers the difference between heat collapse and root rot, which can look similar in early stages.
Heat Damage vs. Overwatering vs. Light Bleaching: How to Tell the Difference
These three problems get confused constantly. The fix for one makes the others worse, so getting the diagnosis right matters.
| Symptom | Heat Damage | Overwatering | Light Bleaching |
|---|---|---|---|
| Leaf texture | Crispy, papery, dry | Mushy, black, soft | Dry, white patches |
| Color | Tan, brown, bleached white | Yellow, black, translucent | White or pale yellow only |
| Pattern | Sun-facing side first | Base of plant, lowest leaves | Top canopy, sun-facing |
| Soil state | Damp or normal | Soggy, smells sour | Any |
| Speed | Hours to 1 day | Days to weeks | Hours to days |
| Smell | Neutral or dry | Sour, rotten, anaerobic | Neutral |
| Recovery | Moves to shade, misted | Dries out, aired out | Permanent, no recovery |
If the jar smells sour or musty alongside the damage, you’re dealing with anaerobic conditions from overwatering, not heat. If only the top leaves are white and lower leaves are fine, it’s pure light bleaching and you just need to relocate.
The overlap case is the tricky one. Heat-stressed plants sometimes get overwatered as a “rescue” attempt. That combination leads to root rot on top of heat damage.
If you’re unsure, default to less water and more shade for 48 hours, then reassess.

Window Placement Risk Chart: North, South, East, and West Sills
Window direction matters more than people think. In the Northern Hemisphere, the sun arcs through the southern sky. That means south- and west-facing windows deliver the most intense direct light, especially from late morning through late afternoon.
| Direction | Risk Level | Peak Hours | Notes |
|---|---|---|---|
| North | Low | None direct | Safe for most closed jars year-round |
| East | Low to moderate | Morning (7 to 11 AM) | Gentle light, usually safe |
| South | High | 11 AM to 4 PM | Most common cause of cooked jars |
| West | Very high | 1 PM to 6 PM | Afternoon heat is brutal on glass |
| Skylight | Extreme | All midday | Direct overhead sun, fastest cooker |
If your jar sits on a south or west sill, the fix is usually 3 to 5 feet of distance from the glass, or a sheer curtain that diffuses direct rays. In our research, simply moving a jar from a west sill to a north-facing interior wall cut internal peak temps by 20 to 30°F.
Season matters too. Winter sun sits lower and passes through more glass at sharper angles. A jar that was fine in summer can overheat in January because the sun now reaches deeper into the room.

What to Do in the First Hour After You Notice It
Speed matters. The faster you act, the more plant tissue you save. Here’s the hour-one checklist.
- Move the jar out of direct sun. Don’t wait to “see if it recovers.” Relocate immediately to a shaded spot with bright indirect light.
- Open the lid for 10 to 15 minutes. This vents superheated air and lets the system cool without shocking the plants.
- Feel the glass. If it’s hot to the touch, leave the lid cracked for 30 minutes.
- Mist with cool water, not cold. Cool mist raises humidity and helps leaves recover turgor. Cold water on heat-stressed tissue can shock cells.
- Don’t water the soil yet. The substrate is almost certainly still damp. More water on stressed roots invites rot.
- Wait 12 to 24 hours. Watch for recovery before doing anything else.
For jars in severe condition, the SOS overwatering guide covers emergency moisture control if the heat spike has been combined with soggy soil.
Mistakes People Make Trying to “Save” a Cooked Jar
Good intentions often make heat damage worse. These are the most common missteps.
- Watering more. The instinct is to soak a wilted plant. Heat-wilted plants need cooling, not water. Overwatering cooked roots leads to rot.
- Putting the jar in the fridge or freezer. Thermal shock cracks glass and kills plant cells. Never do this.
- Cutting all damaged leaves at once. Bleached or crispy leaves still photosynthesize at the green parts. Wait 2 weeks before major trimming.
- Moving the jar to a dark closet. Plants need light to recover. Bright indirect, not dark.
- Repotting immediately. Disturbing roots on stressed plants adds trauma. Wait at least a week.
- Sealing the lid back tight while the jar is still hot. Trapped heat continues cooking. Always vent until the jar reaches room temp.
The recovery signs guide walks through what healthy regrowth looks like in the days after a heat event, so you can tell salvage from slow death.
When the Jar Is Salvageable vs. When to Start Over
Not every cooked jar recovers. Here’s how to gauge your odds.
Likely salvageable:
- Only top leaves or sun-side foliage damaged
- Moss mostly green with small tan patches
- Plants wilted but stems still firm
- New growth emerging within a week
- No sour or rotten smell
Probably a rebuild:
- All moss tan and crunchy
- Stems black or mushy at the base
- Sour, anaerobic smell
- More than 70% of foliage is bleached white or translucent
- No recovery signs after 10 to 14 days
If the jar is borderline, our rebuild or toss guide helps you decide. Often the substrate and hardscape can be reused even when the plants can’t.
Pro Tips for Keeping a Cooked Jar From Recurring
Once you’ve rescued a jar, the goal is making sure it never happens again. A few habit changes take almost no effort and prevent 95% of repeat heat events.
Rotate the jar a quarter turn every few days. Uneven sun exposure causes lopsided damage. A slow rotation evens out the light each side receives.
Use a sheer curtain or static-cling window film on the hottest sills. Both cut direct UV by 40 to 60% without darkening the room. In our research, jars behind basic sheer curtains stayed 15 to 25°F cooler at peak sun.
Set a phone reminder to check the jar at noon on sunny days for the first week after relocation. Touch-test the glass. If it’s warm, move the jar back from the window another foot.
Consider swapping to a grow light on a 12-hour timer. LEDs deliver consistent light without thermal spikes. You eliminate the variable of weather, season, and window orientation entirely.
If you’re set on window placement, matching the jar to the right window cuts risk dramatically. North and east sills work for most closed jars year-round.
Long-Term Care After a Heat Event
The two weeks after a heat spike matter as much as the first hour. Plants are vulnerable to secondary problems, mainly rot and pest outbreaks, while they recover.
Hold off on fertilizing for at least 30 days. Stressed roots can’t process nutrients well, and excess salts burn recovering tissue. Plain misting and stable humidity do more good than any feed.
Watch for fungus gnat flare-ups. Stressed plants release mild volatile compounds that attract gnats. Our gnat infestation guide explains why closed jars are uniquely tricky to treat and which predators actually work.
Check for mushrooms. Heat-killed tissue often triggers fungal blooms within a week. Most are harmless, but thinning heavy growth keeps the system balanced.
Resume normal care only after you see fresh green growth at leaf nodes or stem tips. That signal means the plant has reset its metabolism and can handle light feeding and routine misting again.
Best Closed Terrarium Plants for Sunny Windows
If you love the window look, choose plants that tolerate heat swings. Most tropical terrarium plants do not. A few species handle windowsill conditions far better.
- Succulents and cacti. Built for sun and heat. Need an open jar, not closed.
- Air plants (tillandsia). Tolerate bright light but prefer open airflow.
- Hardy mosses like rock cap moss. Handle more light than sheet moss if misted consistently.
- Jade plants and echeveria. Window-sill veterans, but again need an open setup.
For closed jars, the best plant list and species to avoid walks through which tropicals stay compact and which bolt within months. Fittonia, ferns, and selaginella are gorgeous but not window-sill plants unless the light is heavily diffused.
If you’re committed to a closed jar by a sunny window, plan on rotating the jar or supplementing with a grow light. As of 2026, more hobbyists are running hybrid setups, using window light in winter and LED in summer, to avoid the seasonal heat spikes that catch jars off guard.
Final Verdict: Is Your Cooked Terrarium Worth Saving?
If more than half the foliage is still green and the moss hasn’t gone fully tan, save it. Move, vent, mist, and wait. Most jars with partial damage recover within 2 to 3 weeks and look nearly new by month two.
If the damage is total, the substrate and hardscape are still reusable. Our step-by-step rescue guide covers how to strip the jar, sterilize the glass, and rebuild with fresh plants. Many growers end up with better jars the second time because they learn placement the hard way.
The bigger lesson is prevention. A closed jar is a tiny greenhouse with no thermostat. Treat window placement like choosing a parking spot.
Shade in summer, indirect light in winter, and always check the glass temperature before assuming a spot is “bright enough.” That habit alone prevents the vast majority of cooked jar cases we see in the research.
Quick Seasonal Checklist for Window-Sill Jars
Sun angles shift through the year, so a safe spot in March becomes a cooker by July. Run this checklist each season.
- Spring. Sun is higher but gentler. Most east and north sills stay safe.
- Summer. Move jars 3 to 5 feet back from south and west glass. Add a sheer curtain.
- Fall. Sun lowers and intensifies. West sills get hot afternoons again.
- Winter. Low sun cuts deep into rooms. Jars that were shaded in summer may now sit in direct light for hours.
A 60-second monthly check saves jars. As of 2026, more growers are using cheap thermometer stickers on jar glass to track peak temps without guessing.
Sun angles shift through the year, so a safe spot in March becomes a cooker by July. Run this checklist each season.
- Spring. Sun is higher but gentler. Most east and north sills stay safe.
- Summer. Move jars 3 to 5 feet back from south and west glass. Add a sheer curtain.
- Fall. Sun lowers and intensifies. West sills get hot afternoons again.
- Winter. Low sun cuts deep into rooms. Jars that were shaded in summer may now sit in direct light for hours.
A 60-second monthly check saves jars. As of 2026, more growers are using cheap thermometer stickers on jar glass to track peak temps without guessing.
When to Call It: A Decision Guide for the Cooked Jar
Use this if/then flow the moment you spot damage.
- If more than 70% of foliage is bleached or translucent, then plan a rebuild.
- If moss is fully tan and crunchy, then replace the moss layer but keep the substrate.
- If only sun-side leaves are damaged, then relocate, vent, and wait 2 weeks before trimming.
- If you smell sour or rotten, then crack the lid for 48 hours and check for anaerobic zones.
- If ferns and fittonia collapse but recover in shade within 24 hours, then the jar is fine, just move it.
Why Terrariums Die in the First Month (and How to Avoid It)
Heat is the leading killer of new closed jars, especially in the first 30 days. New jars lack established root systems and can’t recover from thermal stress as well as mature ones. Our first-month die-off guide tracks the most common patterns.
The fix is simple. Start new jars in stable, indirect light for the first 4 to 6 weeks. Only then experiment with brighter spots.
Patience up front prevents most “cooked jar” surprises later.
Maintaining Green Moss All Year Long
Once the moss recovers, keep it green by stabilizing three factors: light, moisture, and temperature. Bright indirect light, consistent humidity, and temps between 65 and 75°F cover about 90% of moss needs.
Avoid the common yellowing triggers like chlorine in tap water, low humidity, and direct sun. If you’re using collected water, our rainwater safety guide covers storage and contamination risks.
A Note on Closed Jar Smells After Heat Damage
Heat-killed tissue breaks down fast and can produce a mild sour or stagnant smell within 48 hours. This is not the same as the rotten-egg anaerobic smell from overwatering. Our smell test guide helps you tell the two apart and decide if venting is enough or a full clean-out is needed.
Frequently Asked Questions
How long does it take for a terrarium to overheat by a window?
Most closed jars on a sunny sill hit dangerous internal temps (above 100°F) within 20 to 45 minutes of direct sun. Thin glass and small jar volumes heat faster. The full visible damage appears over 1 to 3 days, not instantly.
Can a cooked terrarium recover on its own?
Partially, if the heat event was brief and you relocate it quickly. Fittonia and ferns often bounce back in 1 to 2 weeks. Moss recovery is slower and patchy.
Bleached leaf tissue never regains its green color, but new growth can replace it.
Is white fuzz on terrarium plants a sign of heat damage?
No. White fuzz is usually mold or fungal growth, often from overwatering or poor airflow. Heat damage looks like bleached, papery patches, not fuzzy growth.
If you see fuzz, check our terrarium mold guide for the fix.
Should I remove the lid after a heat spike?
Yes, briefly. Crack or remove the lid for 15 to 30 minutes to vent hot air. Once the jar reaches room temperature, you can seal it again.
Leaving the lid off long-term changes the humidity cycle and is a different problem.
Can I use a grow light instead of window light?
Yes, and it’s often safer. Full-spectrum LED grow lights set 12 to 18 inches above the jar provide consistent light without heat spikes. They also let you control intensity and duration precisely.
Window light is unpredictable, especially across seasons.
How do I know if the heat damage is permanent?
Check after 14 days. New growth at leaf nodes or stem tips means the plant is recovering. Tissue that stays tan, black, or mushy is dead.
If no new growth appears and the existing tissue is degrading, the plant is unlikely to bounce back.