
Your terrarium is fogging up, leaves are turning yellow, and you have no idea whether to add water or pull the lid off. How to Revive a Dying Terrarium: Step-by-Step Triage is not about guessing what is wrong. It is about reading the symptoms, matching them to a diagnosis, and applying the exact fix your setup needs.
Get the diagnosis right and most terrariums recover within two weeks. Get it wrong and you will keep making the problem worse.
Our research into closed-container ecosystems shows that roughly seven in ten terrarium crashes trace back to one of five root causes: overwatering, underwatering, fungal overflow, light stress, or pest infestation. Once you identify which cluster your terrarium belongs to, the path forward becomes straightforward. Let us walk through the diagnostic process step by step so you can stop panicking and start fixing.
Quick Answer
You revive a dying terrarium by diagnosing the primary symptom cluster first, then applying the matching intervention. Check condensation patterns, leaf condition, and soil smell. If fog never clears and leaves are yellow and soft, your system is too wet and needs airflow and soil removal.
If glass is bone-dry and tips are crispy, you need measured bottom-watering. Apply one fix at a time and monitor for changes over seven days before adjusting again.
What’s Wrong With Your Terrarium? Start Here
The Triage Mindset: Stop Guessing, Start Diagnosing
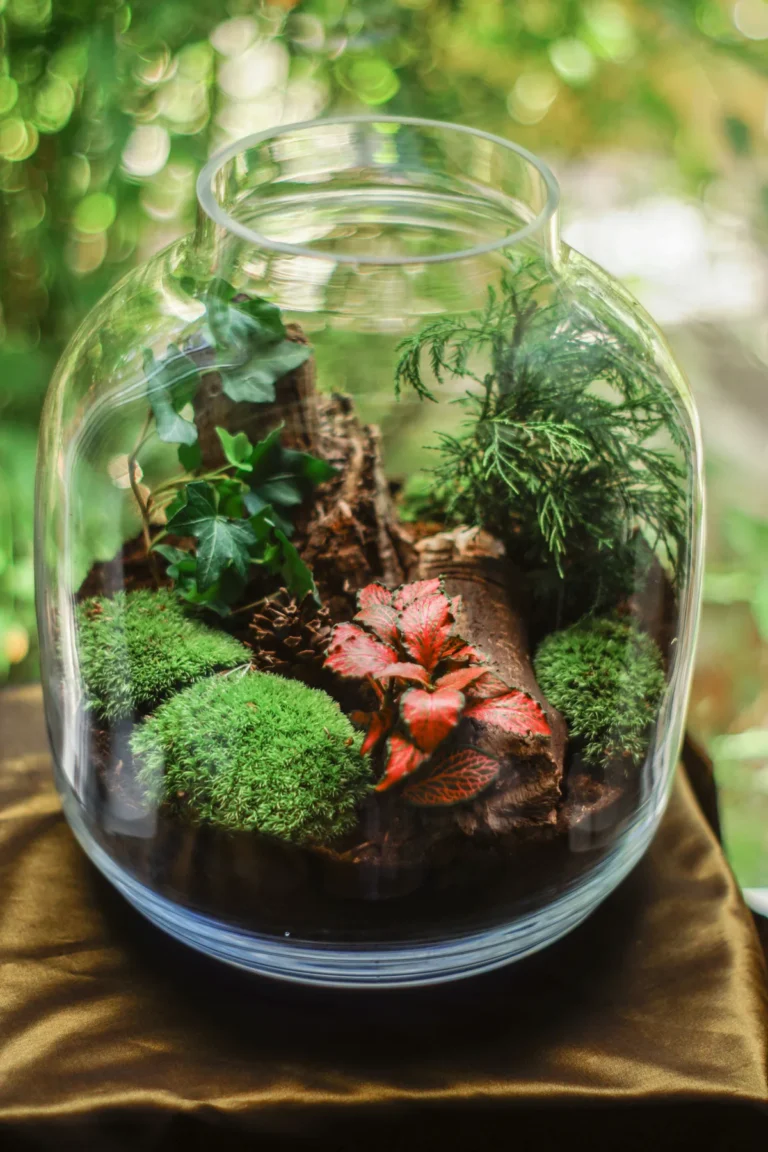
A terrarium is a miniature ecosystem trapped inside glass. It regulates its own moisture, gas exchange, and temperature through a delicate balance. When that balance breaks, the system sends visible signals before anything irreversible happens.
Reading those signals correctly is the difference between saving your terrarium and losing it entirely.
Most people skip the diagnosis step. They see yellow leaves and immediately add water. Or they see condensation and panic-pull the lid off.
Both reactions assume the problem without confirming it. That approach turns a simple imbalance into a full-blown crash.
Triage means pausing before you act. You observe first. You match what you see to known symptom clusters.
Then you pick the single most targeted intervention for that cluster. One change at a time. Watch how the terrarium responds.
Adjust only if nothing shifts after five to seven days. This methodical approach keeps you from compounding mistakes.
Why Most Revivals Fail Before They Begin
Terrarium revivals fail because owners react to symptoms instead of root causes. A wilted leaf looks dry. So water gets added.
But the plant was actually drowning at the roots. More water pushes the problem deeper. Within days, root rot sets in and the whole stem system collapses.
That sequence plays out in countless failed terrariums each year.
Another common failure point is ignoring cross-symptoms. Heavy fog on the glass might seem like normal closed-system behavior. But paired with yellowing fronds and a sour smell, that fog is a warning sign.
Isolating one symptom while missing the others guarantees the wrong fix. Our review of common terrarium crash patterns found that combined symptom analysis cuts failure rates significantly.
Finally, people often change multiple variables at once. They crack the lid, move the jar, trim three stems, and add fertilizer all in one day. When the terrarium does not improve, you cannot tell which change helped or hurt.
Isolating interventions to one at a time is the single most effective revival practice.
Step 1: Read the Signs — Condensation, Glass Clarity, and Soil State
Heavy Fog That Never Clears: Your #1 Warning
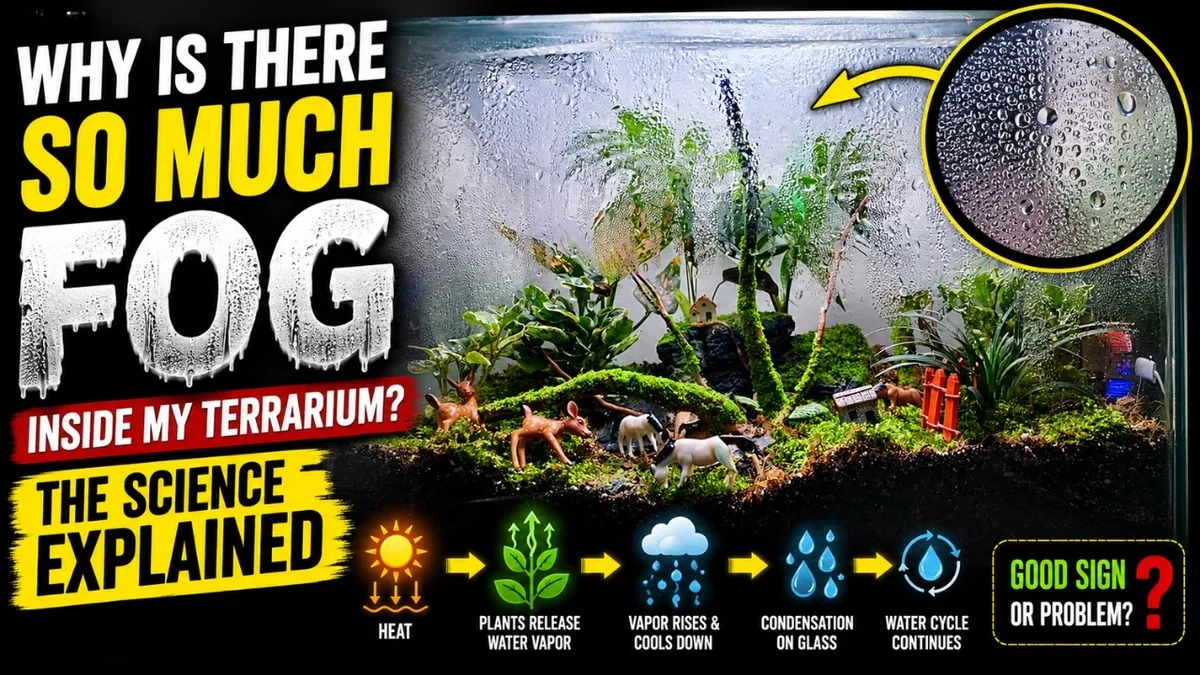
Condensation in a healthy closed terrarium appears and disappears on a daily cycle. Warmth builds fog during the day. Clear glass returns overnight as temperatures drop.
When fog stays thick and persistent through the cooling period, your system is holding too much moisture. The air cannot exchange properly and excess water vapor has nowhere to escape.
This persistent fog is the earliest and most reliable warning sign of an overwatered terrarium. It usually appears within the first week after a crash begins. Ignore it and fungal growth follows within days.
Fix it within hours and you may prevent serious damage altogether.
Persistent Drips Running Down the Sides
Droplets sliding down the interior glass walls indicate extreme moisture saturation. Water is condensing faster than the substrate can absorb it or the plants can transpire it. This condition typically means the soil layer is fully waterlogged or the drainage system has failed.
You should treat this as an urgent situation rather than a slow burn.
Steady dripping also points to a possible container mismatch. A sealed jar designed for humid tropical plants may not suit a setup with succulents or cacti. The greenhouse effect created by glass terrariums intensifies moisture retention beyond what those drought-adapted species can tolerate.
Check whether your plant selection matches your container type before taking any other action.
Bone-Dry Glass and Shrunken Substrate
No condensation at all, combined with soil pulling away from the container edges, means your terrarium is losing moisture faster than it can recycle it. This pattern is most common in open-system setups or sealed jars that started too dry. The substrate shrinks as it dries and tiny cracks appear along the sides.
Plants respond by curling, browning, and eventually dropping leaves.
Bone-dry glass does not always mean the soil underneath is equally parched. The surface layer may feel dry while moisture lingers deeper. Always check below the surface before assuming the entire system needs water.
Cloudy Water Puddles on the Soil Surface
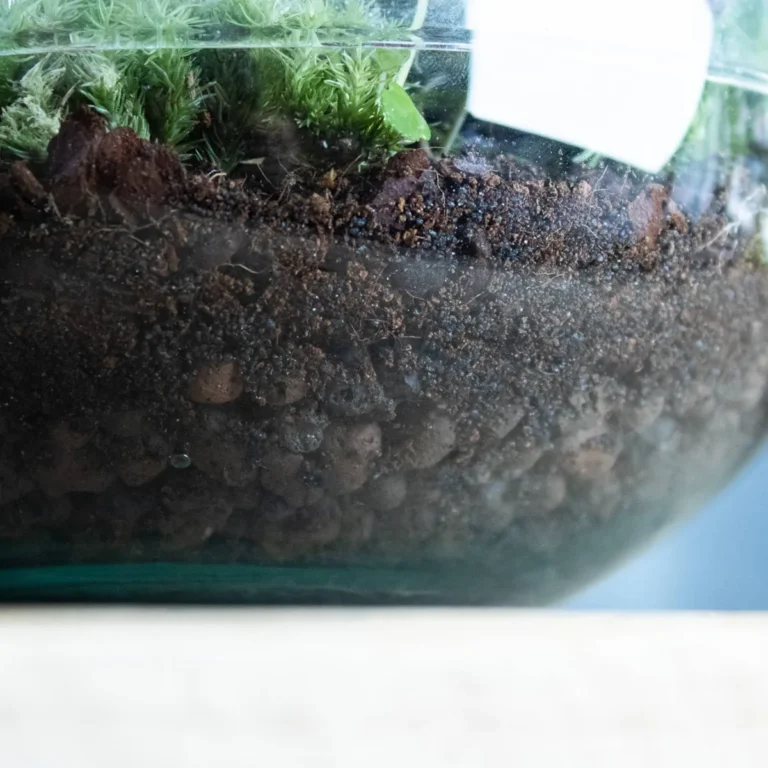
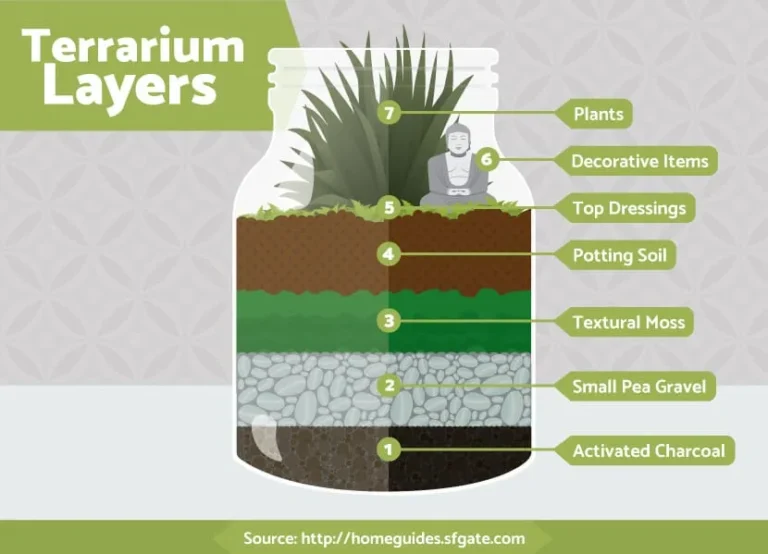
Standing water on top of the substrate is never normal in a functioning terrarium. Healthy systems absorb excess moisture quickly into the drainage layer below. Cloudy puddles signal that water cannot drain fast enough, usually because the charcoal or gravel layer is compressed or absent.
Left unchecked, these puddles become breeding grounds for mold and root-rotting pathogens.
Clearing standing water is a quick first step in any overwatering rescue. Use a syringe or dropper to remove as much surface water as possible before moving on to airflow adjustments and soil replacement.
Step 2: Check the Plants — Leaves, Stems, and Growth Points
Yellow, Soft, or Mushy Leaves = Overwatering or Fungal Onslaught
Soft yellow leaves are the strongest visual indicator that your terrarium holds too much water. The cells inside the leaf fill with excess moisture, lose structural integrity, and turn translucent before collapsing. Affected leaves often fall off at the stem with very little resistance.
If you press a yellow leaf between your fingers, it should feel spongy rather than firm.
This symptom cluster overlaps with early fungal infection. Mold thrives in damp, poorly ventilated tissue. When yellowing spreads rapidly across multiple plants, fungal involvement is likely.
In those cases, improving airflow and removing infected tissue becomes as important as reducing moisture.
Brown, Crispy, or Shriveled Leaves = Dehydration or Root Death
Brown, crunchy leaf tips signal that plant tissue has lost too much water and died. The discoloration starts at the margins and moves inward. Shriveling follows as the remaining cells desiccate.
This pattern appears in underwatered terrariums, but it can also show up when roots have rotted away and cannot absorb water anymore.
The key distinction lies in the soil. Dry, shrunken soil alongside crispy leaves means true dehydration. Moist soil with the same leaf symptoms points to root rot.
Dead roots cannot deliver water regardless of how wet the medium is. In that scenario, adding more water will kill the plant faster.
Black or Translucent Stems at the Base
Black or see-through stems near the soil line indicate advanced rot that has moved past the leaves. This is one of the most dangerous signs in a terrarium. Rot travels upward through the stem and can reach the growing point within days.
Once a stem turns black and mushy, it will not recover.
The immediate action is to remove the affected stem entirely. Cut above the first healthy node using clean scissors. Do not leave any discolored tissue behind.
Disinfect your tools between cuts to prevent spreading pathogens to healthy stems.
New Growth That’s Tiny, Pale, or Stunted
Tiny, pale new leaves suggest the plant is struggling to photosynthesize effectively. This commonly results from insufficient light rather than a moisture problem. Terrarium plants that receive inadequate PAR wavelengths produce weak chlorophyll and stunted new growth.
The light spectrum plants need directly affects how robust new fronds and leaves develop over time.
Pale growth can also signal nutrient depletion in older sealed systems. Nutrients cycle slowly inside a closed environment, but they deplete over months or years. If your terrarium has not been opened or amended in over a year, nutrient loss may be the limiting factor behind weak new growth.
Leaf Drop Without Obvious Cause
Leaves falling off a seemingly healthy plant can signal environmental shock. Recent moves, temperature swings, or sudden changes in light intensity all trigger defensive leaf drop. The plant sheds foliage to reduce water loss while it adjusts to new conditions.
This response is usually temporary if the underlying environment stabilizes quickly.
Persistent unexplained leaf drop, however, often points to root issues beneath the soil. Roots damaged by overwatering, poor drainage, or compacted substrate cannot support the canopy above. Digging gently to inspect the root ball reveals whether the problem sits below ground or above it.
Step 3: Inspect the Substrate and Hidden Layers
Mold That Looks Like White Fuzz on the Soil vs. Black Soot
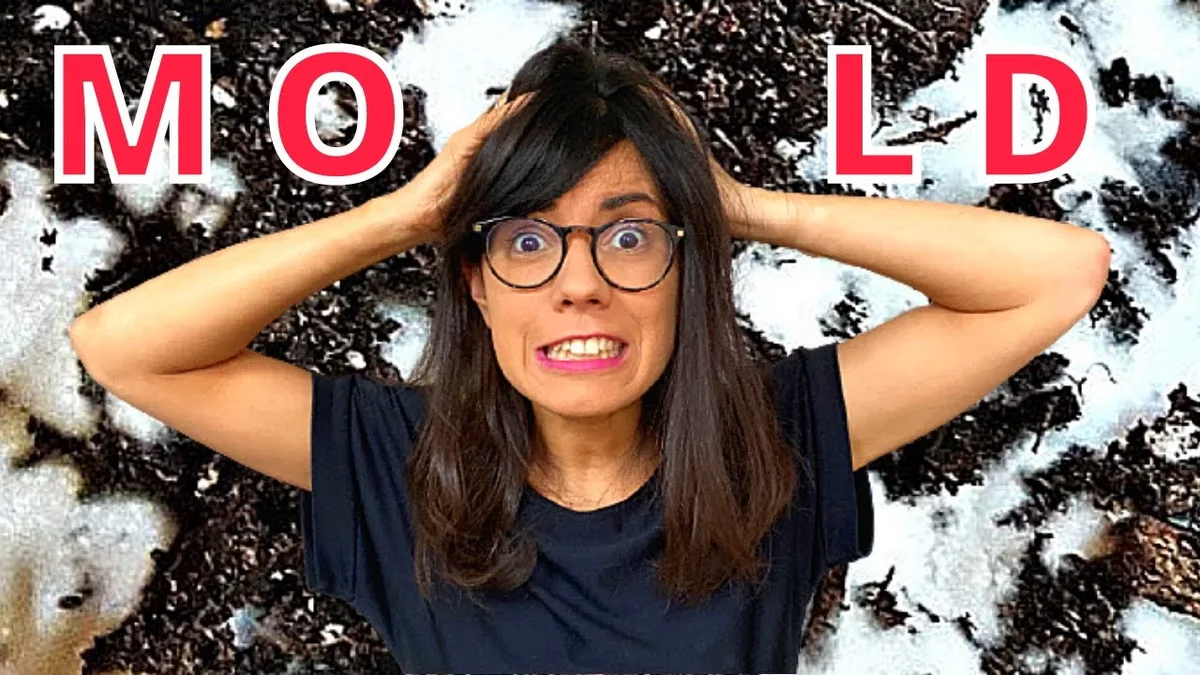
White fuzz on the soil surface is usually saprophytic mold feeding on decomposing organic matter. It is generally harmless to healthy plants but signals excessive moisture and poor air circulation. Black soot or dark slimy patches, on the other hand, indicate active rot or harmful bacterial growth.
Those require immediate intervention.
Distinguishing between these two types of growth matters because the treatment differs. White mold responds to increased airflow and reduced watering. Black residue often demands complete substrate removal and sanitization of the container before replanting.
Algae Blooms on the Glass or Rocks
Green slime coating the interior glass or dark stones is algae, not mold. Algae blooms occur when excess nutrients meet too much direct light. They compete with plants for available CO2 and can smother slow-growing species if left unchecked.
A thin green tint on the glass is common and mostly cosmetic. Thick mats blocking light from reaching lower leaves need physical removal.
Scraping algae from glass with a soft brush or non-abrasive sponge is safe when done carefully. Avoid introducing any cleaning chemicals into the system. Rinsing the tool with hot water between uses prevents cross-contamination between different terrariums.
The Smell Test: Earthy Is Good, Rotten Is Not
A healthy terrarium smells like damp forest soil or a rainstorm outdoors. That earthy scent comes from beneficial microorganisms breaking down organic material safely. A sour, metallic, or rotten egg odor signals anaerobic decomposition.
Bacteria working without oxygen produce foul-smelling byproducts that harm plant roots and overall ecosystem balance.
If your terrarium smells unpleasant, open the lid immediately and let the substrate dry out slightly. Remove any visibly decaying plant matter. The odor should fade within forty-eight hours if the cause was temporary overwatering.
Persistent smells after ventilation indicate deeper contamination requiring substrate replacement.
When to Gently Pull Back the Top Layer to Check Moisture Depth
The soil surface can look dry while the layer beneath remains soaking wet. Checking only the top gives a false sense of security. Gently pull back the upper quarter-inch of substrate with a chopstick or small tool to assess moisture at root level.
If the deeper layer feels cold and clumpy, the system is holding excess water. If it feels dry and crumbly throughout, the terrarium needs measured hydration.
This simple check prevents the most common mistake: adding water to a system that already has enough moisture deep down. Always verify actual soil moisture before deciding to water or drain.
Step 4: Identify the Root Problem Using Your Symptom Checklist
The “Too Wet” Cluster: Fog + Yellow Leaves + Mold + Smell
When heavy persistent fog pairs with yellowing leaves, white mold growth, and a damp sour odor, your terrarium is stuck in the too-wet zone. Every symptom reinforces the others. Excess moisture breeds mold, mold chokes plant tissue, and saturated soil suffocates roots.
Breaking this cycle requires immediate reduction of available water and increase of gas exchange.
This cluster accounts for the majority of terrarium crashes in closed containers. The fix follows a clear sequence: remove standing water, prop the lid open for ventilation, trim compromised plant tissue, and replace the topsoil layer if mold has penetrated deeply.
The “Too Dry” Cluster: No Condensation + Crispy Tips + Shriveled Stems
Absence of condensation combined with brown leaf edges and shriveled stems points directly to dehydration. Plants in this state are losing water faster than their roots can replace it. The soil may look dry on top and feel light when you lift the container.
These plants need gentle rehydration, not a flood.
Bottom-watering through the drainage layer mimics natural precipitation patterns and prevents surface runoff. These common watering mistakes explain why direct pouring often causes more harm than help.
The “Heat/Stress” Cluster: Scorch Marks + Rapid Wilting + Condensation Spike
Sudden temperature spikes create a distinctive pattern. Direct sunlight heating a sealed glass container can raise internal temperatures well beyond what tropical understory plants tolerate. Leaves develop brown scorch patches while condensation surges temporarily as stressed plants release excess moisture through transpiration.
Rapid wilting follows as tissue damage impairs water transport.
Moving the terrarium to bright indirect light resolves this cluster quickly. If the container sits near a south-facing window, relocating it even a few feet away can make the difference between recovery and collapse.
The “Light Issue” Cluster: Leggy Growth + Pale Color + Slow Recovery
Stretched stems reaching toward a weak light source indicate chronic under-lighting. The plant elongates in search of better conditions while producing less chlorophyll. Resulting leaves appear pale green or yellowish and grow slower than normal.
This cluster develops gradually over weeks or months rather than appearing suddenly.
Adjusting light exposure addresses leggy growth, but previously elongated stems will not shrink back. You can trim stretched tissue to encourage bushier regrowth, but prevention through proper light placement matters more than correction afterward.
The “Pest” Cluster: Tiny Flying Insects + Webbing + Sticky Residue
Fungus gnats, spider mites, and mealybugs each leave distinct signatures. Tiny black flies hovering around the soil point to fungus gnat larvae feeding on root matter and organic debris. Fine silk webbing between leaves signals spider mite infestation.
Cottony white clusters at stem joints indicate mealybugs sucking plant sap. Each pest requires a different containment strategy.
Isolating the affected terrarium from other plants prevents spread. Fungus gnats, spider mites, and mealybugs travel through shared air and accidental contact with other containers. Introducing beneficial organisms like predatory mites or nematodes provides long-term biological control without chemicals.
Never use household pesticides inside a sealed terrarium. Chemical residues linger indefinitely in closed systems and harm both plants and any beneficial microorganisms maintaining ecosystem homeostasis.
Step 5: Choose Your Intervention Path Based on Diagnosis
For Overwatering & Mold: Immediate Drying Protocol
When your terrarium sits in the too-wet cluster, every hour counts. Standing water and persistent fog create ideal conditions for root rot and fungal growth. You need to act fast but gently.
Start by removing any visible standing water with a syringe or dropper. Then prop the lid open to increase airflow. A simple wooden skewer or chopstick works perfectly to keep the seal slightly cracked without removing it completely.
This lets excess moisture escape while maintaining enough humidity for your plants.
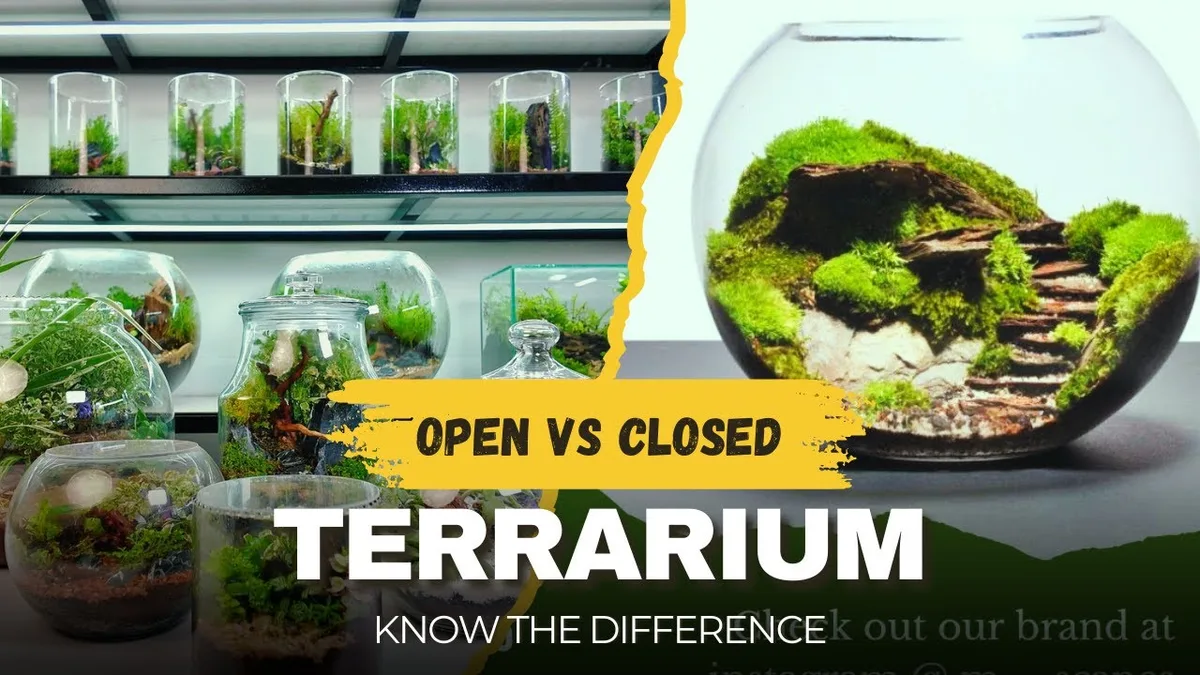
Trim away any blackened or mushy stems immediately. Use clean scissors and sterilize them between cuts. Remove at least half an inch of the topsoil layer if mold has penetrated downward.
Replace it with fresh, dry substrate to interrupt the fungal cycle.
Leave the lid propped open for two to three days. Check daily for condensation improvement. If fog clears and new growth stays firm, gradually reduce the opening over the next week.
Full resealing should happen only after seven stable days.
For Dehydration & Underwatering: Gentle Rehydration Protocol
Underwatered terrariums need patience, not force. Adding water too quickly shocks dry roots and can cause immediate leaf drop. Slow, measured hydration gives the system time to rebalance naturally.
Use a syringe or turkey baster to add small amounts of water directly to the substrate edge. Avoid pouring water onto plant leaves or stems. Bottom-watering through the drainage layer mimics natural precipitation patterns and prevents surface runoff.
These methods follow the water cycle principles explained in our guide.
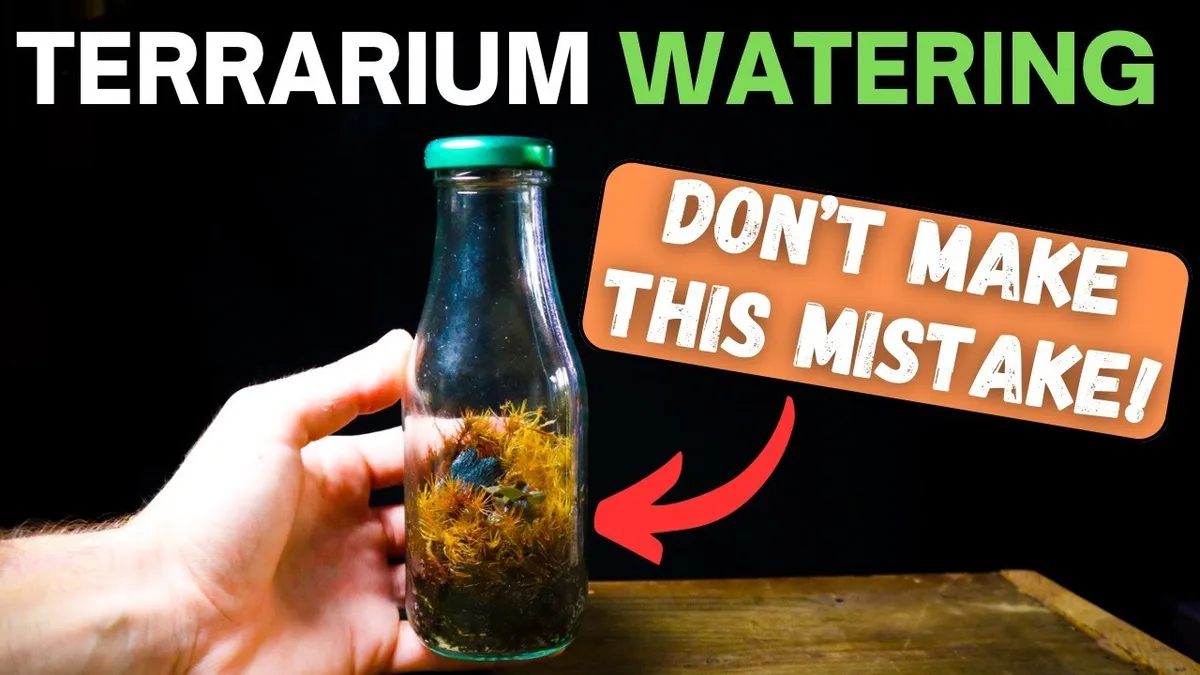
Add roughly one tablespoon per quart of container volume. Wait twenty-four hours before checking condensation levels. Healthy terrariums develop a light morning fog that clears by afternoon.
If no condensation appears after two waterings, repeat the process with another small addition.
Avoid overcorrecting. An underwatered terrarium that receives too much water at once creates the exact overwatering problem you are trying to fix.
For Fungal Gnats and Pest Outbreaks: Containment and Removal
Pest outbreaks require quick isolation. Move the affected terrarium away from other plants immediately. Fungus gnats, spider mites, and mealybugs spread rapidly through shared air and accidental contact.
Yellow sticky traps placed inside the container catch adult gnats effectively. For visible pests like mealybugs, dip a cotton swab in isopropyl alcohol and dab each insect directly. Spider mites respond to increased humidity and gentle leaf misting with water alone.
Introducing beneficial organisms like predatory mites or nematodes provides long-term biological control without chemicals.
Never use household pesticides inside a sealed terrarium. Chemical residues linger indefinitely in closed systems and harm both plants and any beneficial microorganisms maintaining ecosystem homeostasis.
For Algae Blooms: Light Management and Scraping
Algae blooms signal too much light combined with excess nutrients. The green film on glass competes with plants for CO2 and blocks light from reaching lower foliage. Control requires adjusting both factors simultaneously.
Relocate the terrarium away from direct sunlight. Bright indirect light supports plant health without triggering aggressive algae growth. Understanding light spectrum requirements helps you position your setup for optimal photosynthesis rather than algal dominance.
Scrape visible algae from glass using a soft brush or non-abrasive sponge. Remove affected substrate layers if blooms have penetrated below the surface. Reducing feeding or nutrient input addresses the underlying cause.
Most closed terrariums rarely need additional watering because they recycle moisture efficiently. Overfeeding creates the nutrient surplus that fuels algae expansion.
Step 6: Execute the Fix and Monitor the Next 7 Days
The First 24 Hours: What to Expect After Intervention
Your terrarium will look stressed immediately after any intervention. Leaf edges may curl further as the plant adjusts to changed conditions. Condensation patterns shift within hours as airflow or moisture levels change.
These responses are normal and do not indicate failure.
Watch for two specific positive signs during this window. Condensation should begin clearing faster if you addressed overwatering. New firmness in previously soft leaves suggests reduced rot risk.
If symptoms worsen dramatically within twenty-four hours, pause further changes and reassess your diagnosis.
Day 2–4: Watching for New Symptoms or Stabilization
Days two through four reveal whether your intervention is working. Healthy terrariums stabilize within this window. Condensation follows a predictable daily cycle.
Plant color deepens rather than spreading outward from damaged areas.
New yellowing or browning appearing after day two usually means the original problem was deeper than expected. Root rot beneath the soil line takes time to become visible. If you see fresh symptoms emerge, reconsider whether the initial diagnosis matched the actual issue.
Day 5–7: Deciding Whether to Proceed or Pivot
By day five, clear patterns emerge. Improvement means continuing the current approach. Stabilization without regression also warrants maintaining course.
Progress in terrarium revival is rarely linear but directional trends matter more than daily fluctuations.
Worsening conditions after five days signal a misdiagnosis. Return to Step 4 and reassess your symptom checklist. Cross-reference every visible sign against the diagnostic clusters.
The original diagnosis may have missed a secondary problem like nutrient deficiency or temperature stress.
Keeping a Simple Recovery Log
Tracking changes simplifies decision-making significantly. A basic log recording daily condensation levels, leaf appearance, and any interventions taken reveals patterns invisible day-to-day. Note temperature shifts, light changes, and watering amounts alongside visual observations.
Simple tracking formats work best. A weekly spreadsheet or notebook entry with date, condition notes, and actions taken provides enough detail without becoming burdensome. Review entries every three days to spot trends early.
Common Mistakes That Make a Dying Terrarium Worse
Adding more water because the plant looks wilted remains the most frequent error. Wilted leaves in overwatered terrariums result from root rot preventing water uptake, not from lack of moisture. More water deepens the rot and accelerates plant death.
Removing the lid completely for extended periods creates a different problem. Closed terrariums rely on humidity equilibrium. Permanent lid removal drops humidity below species tolerance levels and stresses plants accustomed to stable conditions.
Partial ventilation beats complete exposure.
Trimming more tissue than necessary damages healthy growing points. Every cut removes photosynthetic capacity and redirects energy toward wound healing. Remove only visibly compromised tissue plus a small margin of apparently healthy stem above the damage line.
Moving the terrarium to a new location immediately after intervention adds environmental shock on top of existing stress. Plants recovering from overwatering or pests need stability. Keep the terrarium in one spot with consistent light and temperature throughout the recovery period.
Ignoring persistent odors or fuzzy patches until contamination spreads guarantees worse outcomes. Early mold and fungal growth responds to simple airflow adjustments. Late-stage infestations require complete substrate replacement and container sanitization.
Which Plants Are Worth Saving vs. Which to Propagate Fresh
Some terrarium plants recover remarkably well from serious damage. Ferns, fittonia, peperomia, and moss species bounce back from partial rot or severe dehydration when intervention happens early. Their resilient root systems regenerate quickly once conditions improve.
Other species demand different approaches entirely. Air plants mounted on decorative elements cannot be replanted easily. Carnivorous species like pitcher plants require specific moisture and substrate conditions that make revival complicated inside standard terrarium setups.
Knowing which plants forgive mistakes and which do not saves time and effort.
Cuttings from healthy stems offer a reliable backup strategy. When a main stem shows advanced rot extending past the growing point, propagate viable upper sections instead of sacrificing the entire plant. Most terrarium-friendly species root readily in moist substrate.
Repurposing containers creatively lets you start fresh propagation setups from saved material.
Accepting loss on beyond-recovery specimens prevents wasted effort. A stem that is more than sixty percent blackened or yellowed typically lacks sufficient healthy tissue to sustain regeneration. Prioritize salvageable portions and redirect energy toward plants with stronger recovery potential.
When to Start Over vs. When to Keep Trying
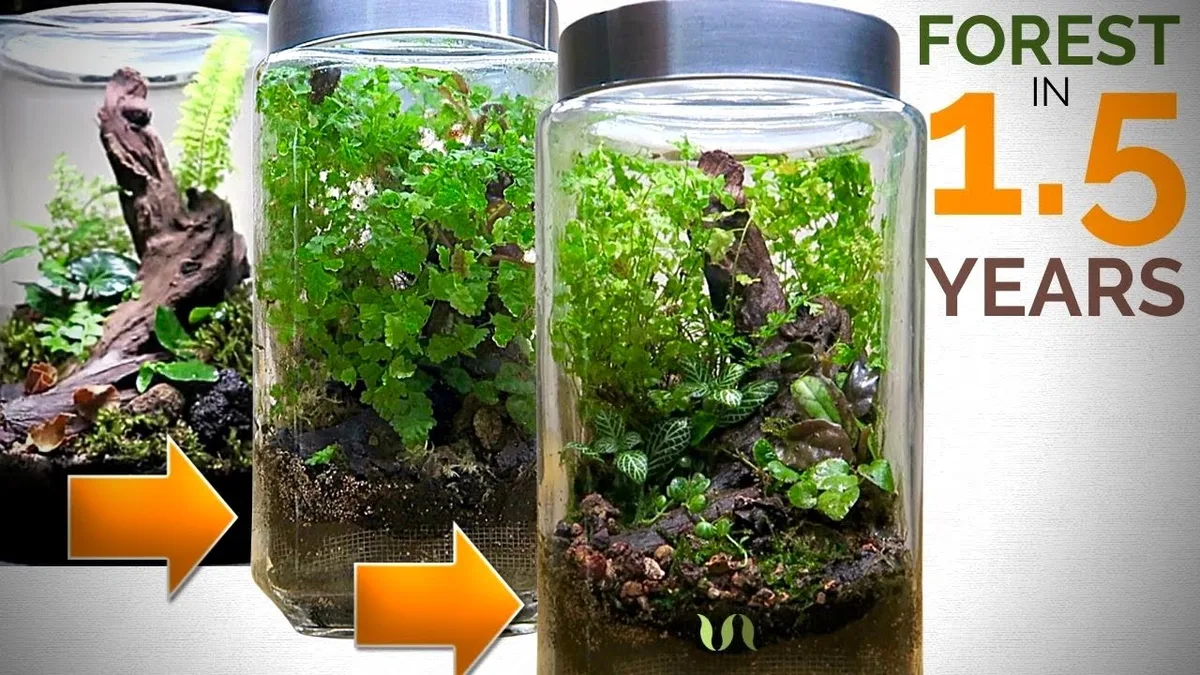
The sixty-percent rule provides a practical cutoff point. If more than sixty percent of visible plant mass shows irreversible damage, restoration becomes unlikely. Continuing intervention drains time and resources better invested elsewhere.
Starting fresh gives you a clean ecosystem built on correct foundations rather than patched together fragments.
Cost-benefit analysis matters too. Complicated revival efforts sometimes exceed the value of the original setup. Beginner mistakes like wrong container choice or unsuitable plant combinations, covered in our container mistake guide, create systemic problems no amount of triage fixes.
Recognizing when foundational errors triggered the crash helps you avoid repeating them.
Emotional attachment complicates rational decisions. Terrariums holding sentimental value or rare specimens deserve extra effort. But practical considerations should still guide the final call.
A severely compromised ecosystem with widespread rot rarely recovers fully even with expert intervention. Honest assessment beats hopeful persistence.
Frequently Asked Questions
Can a fully moldy terrarium ever be saved?
Yes, if mold covers only the surface soil and no stems are blackened. Remove contaminated substrate layers and increase airflow immediately. Complete system failure occurs only when mold penetrates into living plant tissue.
How long does it take to see improvement after fixing overwatering?
Visible improvement typically appears within five to seven days of proper intervention. Condensation should clear during daytime hours first. New leaf firmness indicates root recovery has begun.
Should I remove all the soil if there’s black mold?
Black mold usually signals active rot requiring complete substrate replacement. White mold often responds to surface removal alone. Inspect stem bases before deciding between partial and full soil changes.
What’s the safest way to open a sealed jar with a fungal outbreak?
Remove the lid slowly in a well-ventilated area to avoid spore inhalation. Wear a mask and gloves when handling heavily contaminated systems. Dispose of removed substrate in sealed bags away from healthy plants.
Can I add a humidifier to fix a dry terrarium?
Humidifiers help open-system terrariums but cannot penetrate sealed glass containers effectively. Bottom-watering through the drainage layer addresses moisture deficits more reliably inside closed setups. External humidity affects only container surfaces, not internal microclimates.
Your Next Steps: Maintain Balance and Prevent Future Crashes
Regular check-ins prevent future crashes. Weekly inspections of condensation patterns, leaf color, and soil smell catch problems early. Seasonal adjustments matter too.
Winter heating drys out open terrariums while summer heat can cook sealed jars near windows.
Understanding your terrarium as a living miniature ecosystem helps maintain balance long-term. Gas exchange, water cycling, and nutrient recycling operate continuously inside healthy setups. When any component breaks down, symptoms appear quickly.
Use this triage process whenever your terrarium shows distress signs. Quick diagnosis prevents small problems from becoming system failures. Most terrarium crashes stem from predictable causes with straightforward solutions once you know what to look for.