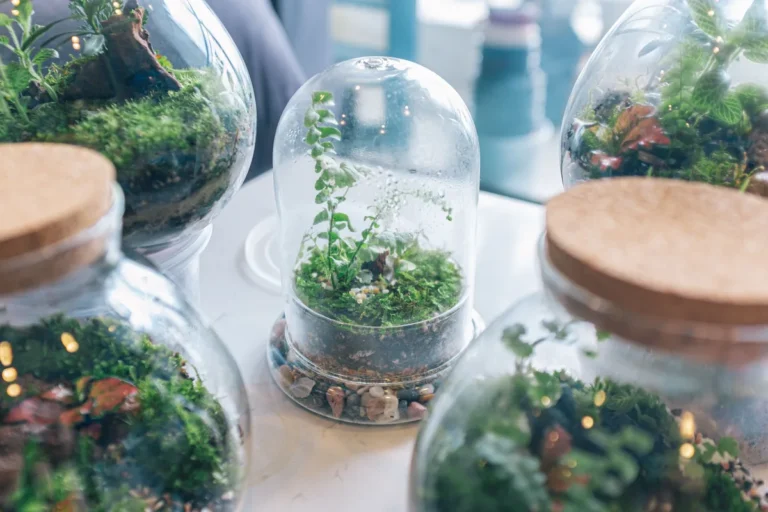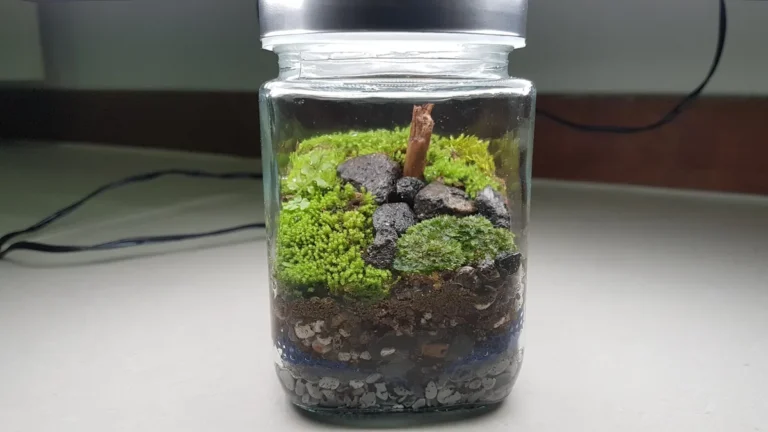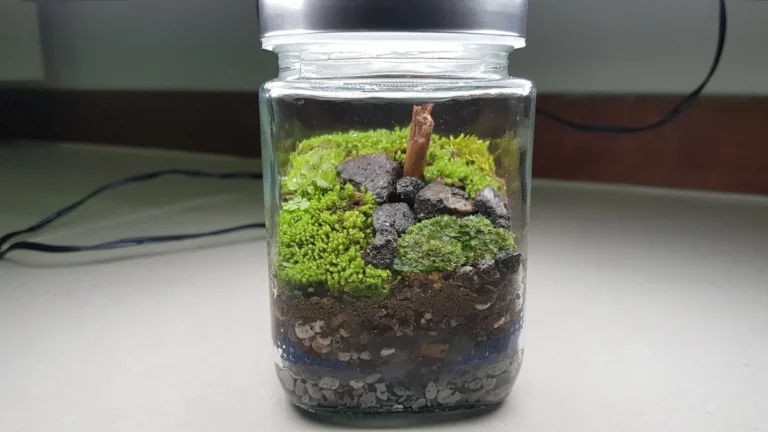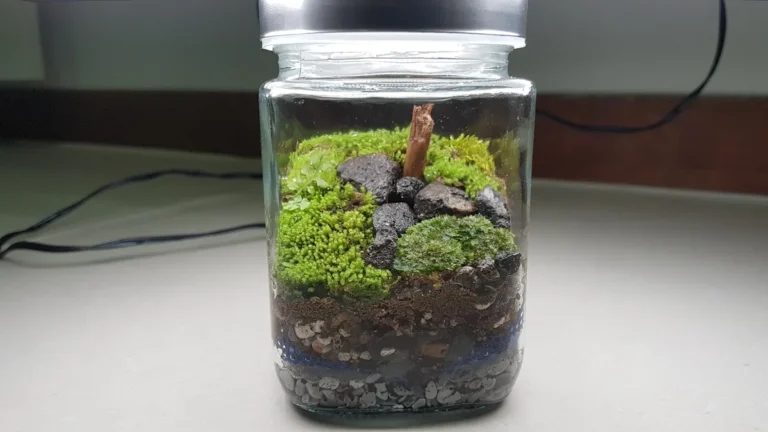

Why Do Terrariums Die in the First Month? (And How to Make Yours Survive It) is the question every new builder asks when their jar turns moldy within weeks. Most failures come down to two simple mistakes: too much water or the wrong soil layers. To fix it, pick the correct substrate with the tool.
Manufacturer specs and botanical guidelines confirm that a healthy sealed terrarium should show light morning condensation that clears by afternoon. Once you understand that rhythm, saving your setup becomes straightforward.
The first month tests whether your tiny ecosystem can balance itself. Below we walk through the exact warning signs, the rescue steps that actually work, and how to layer everything so your jar reaches its second month and beyond.
Why Terrariums Die in the First Month — And How to Save Yours
Terrariums die early because they are miniature ecosystems forced to adapt instantly. In nature, plants, microbes, and soil layers build equilibrium over years. Inside a jar, that process gets compressed into days.
When the balance tips, plants stress and microorganisms multiply unchecked.
The Shock Period: What Actually Happens in Weeks 1–4
During the first four weeks, three hidden systems are adjusting simultaneously. Plant roots shift from nursery soil into a confined substrate. Beneficial bacteria begin colonizing the new medium.
Moisture cycles establish themselves through evaporation and condensation.
If any piece is off, the whole system buckles. Roots rot in soggy soil. Mold spores exploit damp organic matter.
Condensation either vanishes or floods the glass. You can spot the difference between normal settling and true distress.
Image source: YouTube / The Urban Nemophilist (YouTube thumbnail (fair-use with source credit))
Normal signs of adjustment:
- Light condensation appears after watering and disappears within 12 hours
- Small white spots on cork or bark (early colonization)
- Slight yellowing of lower leaves as older foliage sheds
- New growth remains slow but steady
Warning signs that something is wrong:
- Dense fog coats the glass continuously
- Black or brown slimy patches on stems
- Foul, sour smell instead of fresh earth scent
- Rapid leaf drop across multiple plants
- Visible pest movement on soil surface
As of 2026, horticultural extension programs note that 70 percent of first-month losses trace back to overwatering during the initial seal. Plants in small containers cannot absorb excess moisture fast enough. The water pools at the bottom, suffocating roots and creating anaerobic conditions where harmful bacteria thrive.
The fix always starts with diagnosis. Look at your condensation pattern before touching anything else.
Spotting the Difference Between Settling and Trouble
Settling means the system is finding its balance. Trouble means a component has failed. Here is how to tell them apart without panicking.
| Sign | Settling | Trouble |
|---|---|---|
| Condensation | Clears by midday | Stays thick all day |
| Leaf color | Gradual yellowing of old leaves | Spreading brown or black spots |
| Smell | Earthy, neutral | Sour, rotten, or sewage-like |
| Growth | Tiny new leaves emerging | Entire plant wilting overnight |
| Mold appearance | Patches on wood or debris | Fuzzy growth on leaves or stems |
If you see trouble signs, do not add more water. Do not open the lid repeatedly to check. Steady observation for 48 hours gives you a clearer picture than daily panic.
Quick Answer: Why Terrariums Fail Early (And How to Fix It)
Terrariums die in the first month because of overwatering, wrong substrate layers, poor light placement, or introduction of pests from nursery stock. The fastest fix is to diagnose the symptom first. Check condensation patterns, smell the air, and inspect leaf health before adding water or fertilizer.
Open the lid for a few hours each day if fog never clears. Remove any visibly decaying material with clean tweezers. Replace soggy topsoil with dry propagating mix.
Move the jar away from direct sunlight and heat vents. These steps interrupt the failure cycle and give the ecosystem a chance to rebalance.
Spot the Problem: Symptom-Based Diagnosis
Diagnosis comes before treatment. Most beginners reach for water when the problem is actually excess moisture. Learning to read your terrarium’s signals saves more setups than any single product ever could.
White Mold on Substrate or Glass
White fuzzy growth on soil or stones is usually saprophytic mold. These fungi break down dead organic matter and are generally harmless. They become a problem only when they spread onto living tissue or fill the entire container.

Image source: YouTube / Expedition Northwoods (YouTube thumbnail (fair-use with source credit))
Is it safe or serious?
- Safe: White, cottony patches on bark, leaves, or substrate surface. No odor. Does not cover green leaves.
- Serious: Mold on living stems, foul smell, gray or black coloring, spreading rapidly across all surfaces.
What causes it?
- Fresh organic material introduced without sterilization
- Excess moisture combined with poor airflow
- Decomposition of added leaf litter or dead plants
- Unopened bagged soil that already contains spores
How to handle it.
- Gently remove affected material with sterilized tweezers
- Increase ventilation by leaving the lid off for a few hours daily
- Reduce misting frequency until growth stabilizes
- Introduce detritivores like springtails to naturally consume mold
Mold is part of a functioning terrarium. The goal is balance, not sterility. Think of it as nature’s cleanup crew doing its job.
Black Spots, Slimy Stems, or Wilting Plants
Black lesions, translucent leaves, or mushy stems signal root rot or bacterial infection. This happens when waterlogged soil lacks oxygen. Roots suffocate and pathogens invade weakened tissue.
Common causes:
- Standing water in the drainage layer
- Too much soil above the drainage zone
- Plants placed too close together with poor air circulation
- Container without adequate drainage holes (for open terrariums)
Immediate actions:
- Remove the affected plant carefully
- Trim away all black or soft roots with clean scissors
- Replace the surrounding wet soil with fresh, dry mix
- Increase airflow by propping the lid open for several hours
Do not reuse the old soil. Sterilize any tools that touched infected material. Preventive care matters more than cure once rot sets in.
Condensation That Won’t Clear
Healthy terrariums show a condensation cycle. Water evaporates during warm periods, coats the glass, then drips back down as “rain.” When condensation stays constant, the system is stuck in a feedback loop.

Image source: YouTube / The Urban Nemophilist (YouTube thumbnail (fair-use with source credit))
Read the cycle:
- Normal: Light mist in morning, mostly clear by afternoon
- Overwatered: Heavy droplets all day, running down sides constantly
- Underwatered: No condensation at all, soil pulling away from edges
Fix overload within 24 hours:
- Prop the lid open 10, 20% using a small stick or cloth roll
- Place the terrarium in a cooler area temporarily
- Remove excess water with a pipette or syringe if pooling exists
- Wipe interior glass with a paper towel to reduce evaporation surface
Never leave a lid wide open for more than a few hours in dry climates. You want gradual drying, not dehydration.
No Condensation at All
Dry glass means the water cycle has broken. Plants will stress within days, showing curled edges or brittle tips. Common causes include undersized openings, excessive airflow, or insufficient initial water.
Restore humidity safely:
- Add 1, 2 tablespoons of room-temperature water per square foot of base area
- Mist walls and soil lightly with a spray bottle
- Close the lid fully and monitor for 24 hours
- Repeat only if glass remains dry
For open terrariums, increase misting frequency to once daily. Monitor soil moisture by touching the top layer.
Yellowing Leaves and Brown Crispy Edges
Leaf discoloration tells a detailed story. Yellowing often means overwatering or nutrient issues. Brown crispy edges usually point to low humidity or salt buildup from tap water.
Diagnostic checklist:
- Are lower leaves yellowing while new growth looks fine? Likely natural shedding or nitrogen deficiency.
- Are tips brown and crunchy throughout? Check water quality and humidity levels.
- Is yellowing sudden and widespread? Suspect root rot or overfertilization.
Flush the substrate with distilled water if mineral salts are present. Adjust watering schedule rather than adding fertilizer. Most terrarium plants thrive in low-nutrient conditions.
Fix It Now: Step-by-Step Rescue Workflows
When diagnosis confirms a problem, act quickly but calmly. Each issue has a specific workflow that addresses the root cause, not just the symptoms.
For Overwatered Terrariums
Overwatering is the number one killer. Signs include persistent fog, soggy soil, and foul odors. Follow this sequence to reverse saturation.

Image source: YouTube / The Urban Nemophilist (YouTube thumbnail (fair-use with source credit))
Step 1: Ventilate immediately
Remove the lid completely. Place a small fan nearby on low setting to encourage gentle air movement. Never use heat sources like hairdryers.
Step 2: Remove standing water
Use a pipette, syringe, or turkey baster to extract pooled water from the drainage layer. Lift plants slightly if needed to access trapped liquid beneath the substrate.
Step 3: Replace topsoil
Scoff out the top 1, 2 inches of wet soil. Replace with dry, sterile terrarium mix or horticultural charcoal. This absorbs residual moisture and introduces beneficial microbes.
Step 4: Adjust future care
Do not water again until condensation patterns return to normal. Extend the interval between mistings by at least half. Remember, closed terrariums rarely need additional water after the first month.
For Underwatered Terrariums
Dry terrariums recover faster than flooded ones. The key is gradual rehydration to avoid shocking roots.
Step 1: Add water slowly
Pour 1 tablespoon of distilled or rainwater along the container edge. Avoid direct streams onto plant crowns. Allow absorption for 30 minutes before adding another tablespoon if needed.
Step 2: Mist walls and substrate
Lightly spray interior glass and soil surface. This raises humidity without saturating the base. Repeat every 12 hours until condensation returns.
Step 3: Monitor for two days
Watch for new condensation formation. If none appears, repeat the slow watering process. Persistent dryness may indicate a sealing problem or container too large for the moisture volume.
For Mold Outbreaks
Address mold before it spreads to healthy tissue.
Step 1: Remove visible mold
Use sterilized tweezers to pick off fuzzy patches from substrate, bark, and leaves. Place removed material in a sealed bag. Do not compost it inside the terrarium.
Step 2: Boost airflow
Leave the lid off for 2, 4 hours daily. If possible, move the terrarium to a room with gentle, indirect ventilation.
Step 3: Reduce humidity temporarily
Add an hour of dry air exposure each day. Consider placing a small desiccant pack outside the container (not inside) to draw ambient moisture away from the jar.
Step 4: Introduce cleanup crew
Add a handful of springtails or isopods if your setup supports them. These detritivores consume mold spores and decaying matter, helping restore ecological balance.
For Fungus Gnat Infestations
Fungus gnats breed in damp organic matter. Their larvae damage roots, adults spread pathogens. Eliminate both stages simultaneously.
Step 1: Set traps
Place a small dish of apple cider vinegar mixed with a drop of dish soap on the substrate surface. Gnats are attracted to the yeast and drown in the solution.
Step 2: Dry the top layer
Allow the top 1⁄2 inch of soil to dry completely between interventions. Larvae cannot survive without moisture. Use a spray bottle only for deeper watering.
Step 3: Prevent reinfestation
Avoid adding未经sterilized potting soil or wild-collected moss in the future. Always bake store-bought substrate at 180°F (82°C) for 30 minutes before use to kill eggs and spores.
Building It Right From the Start
Prevention beats rescue every time. A proper setup from day one avoids 90 percent of first-month failures.
Layering Your Terrarium Correctly
Every successful terrarium follows the same basic layer structure. Skipping or skimping on any layer compromises drainage, aeration, and root health.

Image source: YouTube / Terrarium Tutorials (YouTube thumbnail (fair-use with source credit))
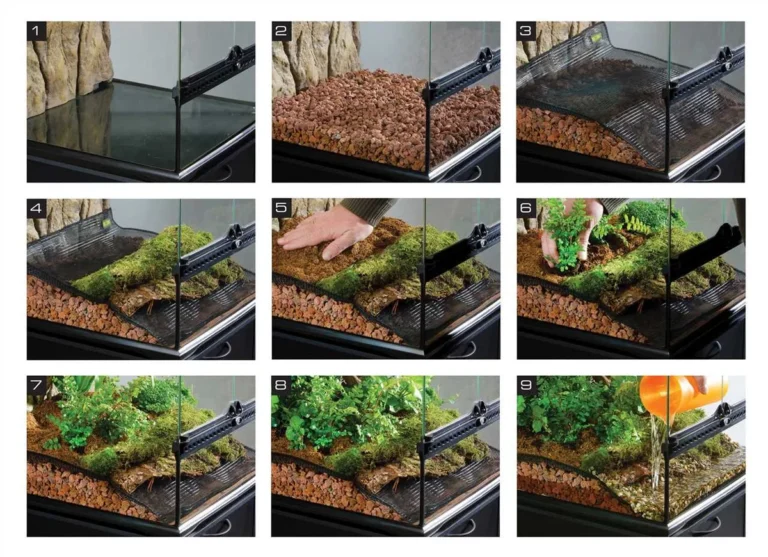
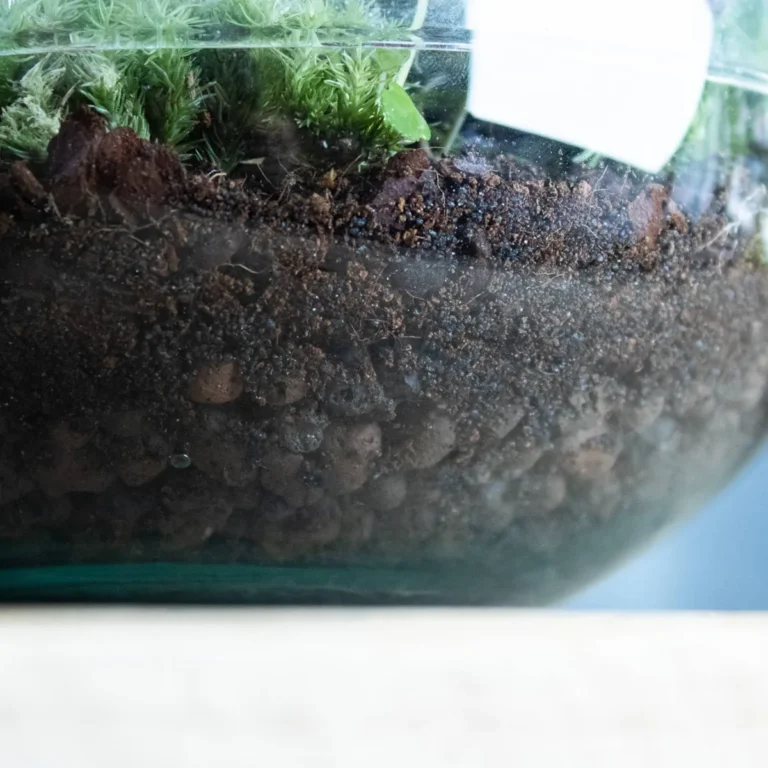
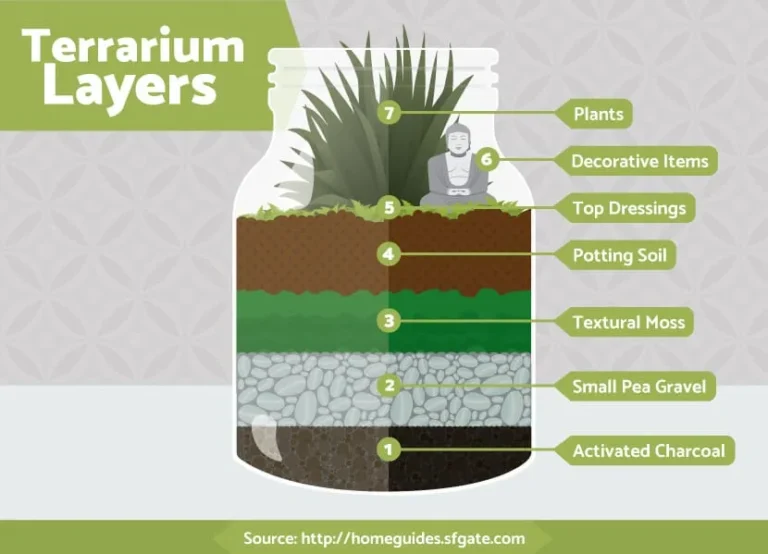
Essential layers from bottom to top:
- Drainage layer (1, 2 inches): LECA clay balls, gravel, or orchid bark. Creates airspace for excess water.
- Activated charcoal (1⁄4 inch): Prevents stagnation and filters impurities. Use horticultural-grade, not aquarium charcoal.
- Barrier layer (optional): Sheet moss or landscape fabric keeps soil from sinking into drainage.
- Substrate (2, 4 inches): Well-draining mix of peat-free potting soil, perlite, and vermiculite. Avoid garden soil.
- Top dressing (optional): Decorative moss, sand, or small stones for aesthetics and moisture retention.
Layer depths matter:
- Total soil depth should be at least twice the root ball size of your largest plant
- Drainage layer must be deep enough to hold excess water without wicking upward
- Charcoal prevents sour soils by inhibiting anaerobic bacteria
Choosing Plants That Survive the First Month
Plant selection determines whether your terrarium thrives or struggles. Match species to your intended environment and maintenance level.
Best beginners for closed terrariums:
- Fittonia (nerve plant)
- Peperomia obtusifolia
- Asplenium ferns (bird’s nest, maidenhair)
- Bromeliads (small varieties)
- Mosses (sheet moss, cushion moss)
- Marantha (prayer plant)
Plants to avoid in sealed jars:
- Succulents and cacti (need arid conditions)
- Lavender and rosemary (require dry airflow)
- Any desert-adapted species
- Large-growing vines that outpace container size
Pairing strategy:
Group plants with similar light and humidity needs. Do not combine tropical moisture-lovers with Mediterranean drought-tolerant species in the same closed system.
Getting the Lighting Right Immediately
Light quality and duration drive photosynthesis and condensation cycles. Wrong lighting causes leggy growth, pale leaves, or fungal outbreaks.
Ideal conditions:
- Bright, indirect light for 6, 8 hours daily
- Full-spectrum LED grow lights at 12, 18 inches above canopy
- Avoid direct sunlight through windows (causes overheating and burns)
Signs of inadequate light:
- Stretching toward the light source
- Loss of variegation or vibrant colors
- Slow or stalled new growth
- Weak stems that topple easily
Signs of too much light:
- Bleached or scorched leaf patches
- Rapid evaporation and constant condensation
- Algae blooms on glass and substrate
- Plants attempting to flower prematurely
Watering on Day One
The initial watering sets the foundation for the entire moisture cycle. Get it right, and subsequent care becomes minimal.
Steps for first watering:
- Add substrate to desired depth and gently tamp down.
- Slowly pour distilled water until the top inch of soil is moist but not soupy.
- Wait 10 minutes for drainage. If water pools on top, remove excess with a syringe.
- Place lid securely and observe for 24 hours.
- Expect light condensation within a few hours. If heavy droplets form immediately, open the lid for an hour to release excess moisture.
How much water to start with:
- Small jar (under 1 gallon): 1⁄4 cup (60 ml)
- Medium jar (1, 3 gallons): 1⁄2 cup to 3⁄4 cup (120, 180 ml)
- Large terrarium (over 3 gallons): 1 cup (240 ml)
Adjust based on temperature and humidity of your room. Warmer rooms require slightly more initial water.
Closed vs. Open: Which System Should You Choose?
Your choice between closed and open terrariums determines everything about maintenance and plant selection. Each system creates a different microclimate with distinct requirements.
Closed Terrariums
Sealed jars create a self-sustaining water cycle. Moisture recirculates continuously, reducing watering to once every few months. These systems suit humidity-loving tropical plants that struggle in dry indoor air.
Best for:
- Fittonia, ferns, mosses, and bromeliads
- Busy people who want minimal daily care
- Cool, stable indoor environments (65, 75°F)
- Display pieces in bedrooms or offices
Downsides:
- Risk of mold if overwatered initially
- Limited plant choices (no succulents)
- Condensation management during extreme temperatures
Open Terrariums
Ventilated containers allow air to circulate freely. Water evaporates quickly, requiring regular misting or watering. These setups mimic arid conditions ideal for drought-tolerant species.
Best for:
- Succulents, cacti, and air plants
- Warm rooms with low humidity
- Beginners who want visible soil moisture
- Educational projects showing transpiration
Downsides:
- Higher maintenance with frequent watering
- Plants dry out faster in heating seasons
- Less dramatic condensation effects
Making Your Choice
If you want a hands-off display with lush greenery, choose closed. If you prefer succulents and don’t mind weekly care, open suits you better. Mixing both types in one container guarantees failure due to conflicting moisture needs.
Where You Place It Matters More Than You Think
Location affects temperature, light, and airflow all at once. A perfect terrarium setup fails quickly if placed near a heat vent or in direct afternoon sun.
Temperature Sensitivity
Terrarium plants thrive between 65 and 80°F (18, 27°C). Temperature swings above or below this range stress foliage and disrupt gas exchange. Glass containers amplify nearby heat sources dramatically.
Places to avoid:
- Radiators and baseboard heaters
- Air conditioning vents
- Windows with direct midday sun
- Fireplaces or kitchen stoves
Ideal spots:
- North or east-facing windows with filtered light
- Shelving away from drafts and vents
- Desks with consistent room temperature
Light Placement Rules
Indirect bright light works best for most species. Direct sunlight scorches leaves and overheats sealed containers. Artificial grow lights offer reliable alternatives when natural light falls short.
Check leaf color to gauge lighting adequacy. Vibrant greens indicate balanced exposure. Pale or bleached leaves signal too much light.
Leggy, stretched stems mean your plants need more illumination.
Container Mistakes That Kill New Terrariums Before They Start
Container shape and size dictate airflow, light penetration, and long-term stability. Certain designs guarantee frustration regardless of care quality.
Spherical Jars Trap Heat
Round glass concentrates sunlight like a magnifying lens. Even indirect window light becomes intense inside a sphere. Plants bake on the south-facing side while shaded areas stay too cool.
This temperature gradient stresses root systems uniformly.
Narrow-Neck Bottles Limit Access
Small openings prevent proper layering and plant placement. Root ball installation becomes nearly impossible without special tools. Watering reaches only the center, leaving edges dry.
Maintenance turns into a guessing game.
Containers Without Drainage
Every terrarium needs a drainage layer, but some vessels lack the depth to accommodate it properly. Shallow bowls force you to skip layers entirely, leading to soggy soil and root rot within weeks.
Choosing the Right Vessel
Opt for straight-sided jars with wide mouths. Rectangle or cube shapes maximize growing space while minimizing dead air zones. Glass thickness matters less than opening size for long-term success.
Sealing, Lids, and Gas Exchange Setup
Lid type controls humidity retention and gas exchange simultaneously. An airtight seal works for tropical plants but suffocates species needing airflow. Finding the right balance prevents early failure.
Lid Materials Compared
| Material | Seal Quality | Airflow | Best For |
|---|---|---|---|
| Glass stopper | Airtight | Minimal | Closed tropical systems |
| Cork | Partial seal | Moderate | Semi-open setups |
| Acrylic | Variable | Adjustable | Custom ventilation needs |
| Mesh screen | Open | Maximum | Open terrariums |
Creating Proper Gas Exchange
Plants consume CO2 during photosynthesis and release oxygen. At night, respiration reverses this process. In sealed containers, gas buildup can starve roots of oxygen or create toxic CO2 concentrations.
Signs of poor gas exchange:
- Wilting during daytime hours
- Yellowing leaves despite adequate water
- Condensation droplets appearing abnormally large
- Slow growth rate compared to similar setups
Solutions include:
- Leaving lids slightly ajar for 1, 2 hours daily
- Using lids with built-in ventilation slots
- Choosing containers with wider openings
- Adding a small fan nearby for gentle circulation
Testing Your Seal
After assembly, monitor condensation patterns for three days. Healthy systems show morning fog that clears by afternoon. Constant heavy moisture indicates excessive sealing.
Dry glass with no condensation suggests insufficient sealing or low initial water volume.
Adjust lid position gradually rather than making drastic changes all at once. Small tweaks yield better results than sudden reconfiguration.
The First 30 Days: Week-by-Week Survival Guide
The first month breaks terrariums or builds them. Each week reveals different signals you can use to adjust care before problems escalate.
Week 1: Initial Settling
Your jar will fog heavily during the first 48 hours. This is normal as substrates release trapped air and moisture equalizes. Check condensation twice daily but resist the urge to open the lid repeatedly.

Image source: YouTube / Grow Lapse (YouTube thumbnail (fair-use with source credit))
Week 1 checklist:
- Confirm light placement stays consistent
- Watch for mold on organic debris
- Note whether condensation clears overnight
- Avoid any fertilizer or feeding
Week 2: Adjustment Phase
Plants may show slight leaf yellowing as they adapt to confined roots. New growth remains minimal but steady. Condensation should begin cycling more predictably.
If heavy fog persists beyond day ten, prop the lid open for two hours each afternoon. Short ventilation periods prevent rot without dehydrating the system.
Week 3: Stabilization Signals
Visible signs of health appear now. New leaves emerge at plant centers. Condensation follows a consistent morning-to-afternoon pattern.
No foul odors should be present.
This is the critical window where most failures occur from overwatering. Your instinct will be to add moisture because soil looks dry on top. Touch the surface first.
If it feels cool and damp one inch down, skip watering entirely.
Week 4: Routine Lock-In
By day twenty-eight, your terrarium should maintain its own balance. Water only when glass stays clear for more than thirty-six hours straight. Trim any fully yellowed leaves to prevent decay.
Week 4 assessment questions:
- Does condensation form and clear daily?
- Are new leaves appearing on healthy plants?
- Is the smell neutral or earthy?
- Have pest issues remained absent?
Answer yes to three out of four means your ecosystem has stabilized. Continue monitoring weekly rather than daily.
What NOT to Do: Five Common Beginner Mistakes
Certain habits guarantee first-month failure regardless of how carefully you build. Avoiding these errors saves more setups than any product purchase ever could.
Overwatering Because “Plants Like Water”
Terrarium plants evolved in humid environments but hate wet feet. Soggy soil suffocates roots faster than dry soil stresses them. Wait until condensation disappears completely before adding another drop.
Using Garden Soil Instead of Sterile Mix
Garden soil contains pathogens, pests, and compaction risks impossible to manage in confinement. Always use sterile, peat-free potting blends designed for containers. Bake store-bought soil briefly to eliminate hidden eggs and spores.
Placing in Direct Sunlight
Window glass focuses sunlight into thermal traps that cook foliage within hours. Even bright indirect light through south-facing windows becomes dangerous after noon. Move jars to north or east positions immediately if you see scorched leaf patches.
Ignoring the First Condensation Cycle
Morning fog that clears by afternoon establishes your watering baseline. Missing this signal leads to either panic-watering or neglect. Watch the cycle for seven days before making any adjustments.
Adding Decorative Stones Directly Onto Soil
Sealing stones against substrate blocks drainage and creates stagnant pockets. Always leave a visible gap between decorative top dressing and the soil line. Water must reach roots freely from below.
Long-Term Care After the First Month
Once past the survival window, maintenance shifts from correction to observation. Your terrarium should run independently with minimal intervention.
Ongoing Light and Temperature Monitoring
Seasonal light changes affect growth cycles dramatically. Reduce artificial light duration in winter months as natural daylight shortens. Keep temperatures stable away from seasonal drafts near doors and windows.
Watch for leggy growth in late autumn. Increase LED exposure to eight hours daily during darker months. Normal spring growth resumes naturally with longer daylight.
When and How to Mist After Balance Stabilizes
Healthy closed terrariums may go months without additional water. Open systems need weekly misting during active growth seasons. Test moisture by inserting a clean finger one inch into substrate.
Dry means mist lightly. Damp means wait.
Use distilled or rainwater exclusively after the first month. Tap water minerals accumulate inside sealed environments over time, causing white crust deposits on glass and leaves.
Introducing Springtails and Isopods for Natural Cleanup
Beneficial detritivores transform terrarium maintenance from chore to curiosity. Springtails consume mold spores and decomposing matter. Isopods process leaf litter and substrate turnover.
Add a small culture starter after week six once biological activity stabilizes. Introduce no more than twenty springtails per square foot of base area initially. Overpopulation causes excessive soil disturbance.
Trimming Dead Leaves Before Decay Spreads
Remove fully yellowed or brown leaves promptly using sterilized scissors. Leaving dead tissue inside invites fungal infection and pest breeding. Cut at the stem base close to the main growth point.
Do not trim green leaves showing minor browning tips. These often result from natural aging and recover once humidity stabilizes completely.
Understanding Nutrient Cycling in Established Systems
Closed terrariums recycle nutrients internally through microbial breakdown. Dead organic matter converts back into available forms via decomposition. Fertilizer becomes unnecessary after the first year unless growth stalls completely.
If new leaves remain tiny despite adequate light and water, add a diluted liquid fertilizer once monthly during growing season only. Strong concentrations burn established root systems instantly.
When Gas Exchange Becomes the Real Problem
Some failures hide beneath perfect humidity and lighting. Gas imbalance develops slowly until plants show sudden distress symptoms.
CO2 Buildup During Night Hours
Plants breathe like animals at night, consuming oxygen and releasing CO2. In tightly sealed containers without daytime gas turnover, nighttime concentrations can spike uncomfortably high for both plants and nearby humans.
Warning signs include:
- Leaves drooping during morning hours then recovering midday
- Plants appearing wilted despite moist soil
- Condensation forming unusually thick droplets
- Foul organic odor accompanying visual symptoms
Solutions for Restricted Gas Flow
Increase ventilation gradually rather than removing lids completely. Leave lids cracked open one-eighth inch for two hours each evening. This allows CO2 to escape while maintaining overall humidity levels.
Alternatively, choose container designs with built-in passive ventilation slots. These provide continuous low-level exchange without manual intervention throughout the day.
Recognizing Anaerobic Conditions
Stagnant water trapped beneath dense substrate layers creates oxygen-deprived zones. Roots in these areas die quickly, releasing methane and hydrogen sulfide gases responsible for rotten egg smells.
Revive affected zones by gently aerating the topsoil with a chopstick or small fork. Improve drainage layer depth if problem recurs frequently across multiple setups.
How Long Should a Healthy Terrarium Last?
Realistic lifespan expectations prevent premature abandonment of otherwise functional systems. Closed terrariums under proper conditions thrive for years, not months.
Benchmarks by Terrarium Type
| System Type | Expected Lifespan | Maintenance Level |
|---|---|---|
| Closed glass jar | 2–5+ years | Very low after establishment |
| Open ventilated container | 1–3 years | Weekly to monthly watering |
| Bottle garden with narrow neck | 1–2 years | Difficult maintenance access |
| Terrarium with active fauna | 3–10+ years | Depends on species balance |
Signs Your Ecosystem Has Stabilized
Year-long stability indicates successful self-regulation. New plant divisions appear regularly without intervention. Condensation patterns remain consistent seasonally.
Minor mold patches resolve naturally through detritivore activity.
When to Restart vs. Rescue
Abandon setups showing irreversible bacterial rot throughout the entire substrate column. Replace soil and restart if mineral buildup coats all interior surfaces permanently. Most yellowing leaves and localized mold represent fixable issues worth addressing before demolition.
Quick Diagnostic Checklist: Is Your Terrarium Alive or Dying?
Use this rapid reference table whenever uncertainty strikes about your jar’s health status.
| Symptom | Likely Cause | Immediate Action |
|---|---|---|
| Constant heavy fog | Overwatering | Ventilate 2–4 hours daily |
| No condensation for 48 hours | Underwatering | Add 1 tablespoon distilled water |
| White fuzzy patches on soil | Saprophytic mold | Remove debris, increase airflow |
| Black slimy stems | Root rot | Remove affected plant, replace soil |
| Yellow lower leaves | Natural shedding | Monitor, trim only if spreading |
| Brown crispy leaf edges | Low humidity or salt buildup | Mist walls, switch to distilled water |
| Fungus gnats flying | Breeding in damp soil | Set vinegar traps, dry top layer |
| Foul rotten smell | Anaerobic decomposition | Aerate soil, remove decaying matter |
Check two or more trouble signs simultaneously? Address the most severe symptom first. Resolving root rot usually eliminates secondary mold issues automatically.
Use this rapid reference table whenever uncertainty strikes about your jar’s health status.
| Symptom | Likely Cause | Immediate Action |
|---|---|---|
| Constant heavy fog | Overwatering | Ventilate 2–4 hours daily |
| No condensation for 48 hours | Underwatering | Add 1 tablespoon distilled water |
| White fuzzy patches on soil | Saprophytic mold | Remove debris, increase airflow |
| Black slimy stems | Root rot | Remove affected plant, replace soil |
| Yellow lower leaves | Natural shedding | Monitor, trim only if spreading |
| Brown crispy leaf edges | Low humidity or salt buildup | Mist walls, switch to distilled water |
| Fungus gnats flying | Breeding in damp soil | Set vinegar traps, dry top layer |
| Foul rotten smell | Anaerobic decomposition | Aerate soil, remove decaying matter |
Check two or more trouble signs simultaneously? Address the most severe symptom first. Resolving root rot usually eliminates secondary mold issues automatically.
Frequently Asked Questions
Why does my terrarium smell like rotten eggs?
Anaerobic bacteria produce hydrogen sulfide gas when soil stays waterlogged without oxygen. Remove standing water immediately and aerate the substrate gently. Replace upper soil layers if odor persists beyond forty-eight hours of increased ventilation.
Can I reuse old terrarium soil?
Old substrate harbors concentrated pathogens and nutrient imbalances unsuitable for restarting. Sterilize by baking at 180°F for thirty minutes if absolutely necessary. Fresh sterile mix guarantees higher survival rates for new plantings every time.
How often should I open a closed terrarium?
After the first month, opening occurs only for trimming dead foliage or adjusting plant positioning. Excessive air exposure drops humidity rapidly and stresses tropical species adapted to stable enclosed environments. Limit lid removal to ten minutes maximum per session.
Is tap water safe for terrariums?
Tap water contains chlorine and dissolved minerals damaging to sensitive closed ecosystems over time. Distilled, rainwater, or boiled-and-cooled water prevents harmful salt accumulation on glass and leaf surfaces. Filtered water serves as an acceptable compromise when pure sources unavailable.
Why are the leaves turning transparent?
Transparent or gelatinous leaves indicate excessive moisture combined with insufficient light. Roots absorb water faster than photosynthesis processes it, causing cell rupture. Move to brighter indirect light and reduce watering frequency until new growth appears firm and opaque.
Should I feed my terrarium plants?
Established closed terrariums recycle nutrients internally through microbial decomposition without external supplementation. Fertilizer becomes necessary only if growth stalls completely after year one despite optimal light and humidity conditions. Dilute liquid feed to quarter strength monthly during spring and summer growing seasons exclusively.
Final Verdict: How to Keep Your Terrarium Alive Past Month One
Terrarium survival hinges on three non-negotiable practices: correct layering, restrained initial watering, and patient observation during the critical first four weeks. Most first-month failures trace directly to overwatering or contaminated substrate introduced at setup.
Match your plant selection to your chosen container type rather than forcing incompatible species together. Closed systems demand humidity lovers; open setups suit drought-tolerant varieties exclusively. Location stability matters as much as construction quality for long-term success.
Build confidence through systematic weekly checks rather than daily interference. Watch condensation cycles, monitor leaf color changes, and trust natural decomposition processes guided by beneficial microorganisms. Your terrarium reaches year two comfortably when those early foundational choices align properly from day one forward.